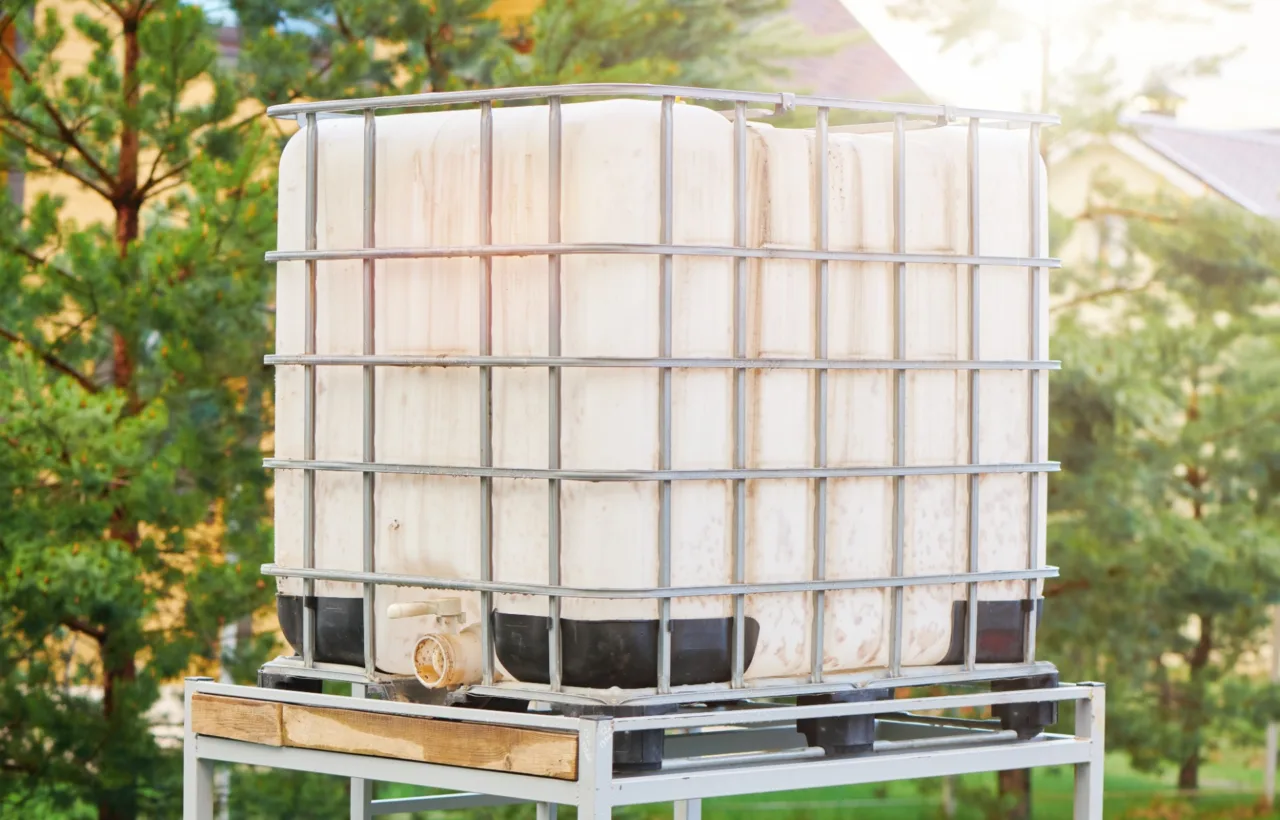

I spent months staring at overpriced store-bought coops and half-built wooden frames that never quite worked. Then I found an old IBC container and turned it into a solid chicken coop that has kept my hens safe and happy for over a year now. This is the full story of how I did it, what went wrong, and what actually stuck.
I started with four hens and zero budget for anything fancy. Traditional coops looked nice online but cost more than I wanted to spend. An IBC container chicken coop solved that problem without forcing me to settle for something flimsy.
Why I Chose an IBC Container for My Chicken Coop
I needed something tough, weatherproof, and cheap. Wood warps. Prefab coops fall apart after one rough winter. An IBC tote (those big 275-gallon plastic tanks inside a metal cage) already had the structure I needed.
The metal cage stops most predators from chewing through. The thick plastic bottle cleans up fast. It sits low to the ground and does not need painting or sealing to stay dry. I grabbed a used one for forty bucks from a farm supply place that was clearing out extras.
Honestly? I almost walked away from the first one because it smelled like whatever chemical it once held. A thorough scrub fixed that. Food-grade would have been ideal, but a deep clean with soap, vinegar, and a pressure washer made the difference.
See, the dimensions work perfectly for a small flock. A standard 275-gallon IBC measures about 48 inches long by 40 inches wide by 46 inches tall. That gives roughly 13 square feet of floor space. I house four standard hens in mine with room to spare once I added a small attached run.
Set the low IBC on pavers or a gravel pad: slight elevation improves drainage and makes digging predators work harder around the coop.
Finding and Preparing the Right IBC Container
I looked for used totes on local farm groups and industrial surplus sites. Prices ranged from thirty to eighty dollars depending on condition. Square cage rails make cutting and attaching things easier than the round-bar versions.
I checked for cracks in the plastic and rust on the cage. Then came the cleaning. I drained whatever residual liquid remained, removed the valve, and scrubbed every surface. Hot water and dish soap handled most of it. A vinegar rinse cut any leftover odor.
Some people worry about previous contents. I did too. I avoided anything labeled with pesticides or heavy solvents. Once the plastic was clean and dry, the risk dropped to almost nothing for a coop that does not store food. Still, I preferred ones that once held water or food products when I could find them.
I flipped the cage so the metal frame protected the top and sides better. That simple move gave me a ready-made roof support and extra strength against climbing predators.
After removing the valve, cap the opening with hardware cloth or a threaded plug; uncovered outlets invite rodents and let bedding escape.
Materials I Used and What It Cost Me
I kept the list short on purpose. No fancy tools beyond what most people already own or can borrow.
- Used 275-gallon IBC tote: $40
- Half-inch hardware cloth (about 20 square feet total): $35
- Barrel bolt latches and carabiners: $18
- Scrap 2×2 lumber for roosts: $0 (leftover from another project)
- Nesting boxes made from old plastic crates: $0
- Zip ties, self-tapping screws, and hinges: $15
- Optional light-colored exterior paint for UV protection: $20
Total came in under $130. A more polished version with new lumber and vents might hit $250. Either way, it stays far below most ready-made options.
I used an angle grinder for the steel cage and a jigsaw for the plastic. Safety glasses and gloves stayed on the whole time. Sharp edges after cutting will cut a hen’s feet or your hands if you skip the filing step.
Drive self-tapping screws through cage rails whenever possible, using plastic only as cladding; the flexible tank wall alone will not hold hardware securely.
Step-by-Step: How I Built My IBC Container Chicken Coop
I finished the main structure in one long Saturday. The details took another afternoon.
Cutting the Door and Vents
I marked an opening 18 inches wide by 22 inches tall on one long side. The bottom edge sat about five inches above the floor so bedding would not spill out constantly. I cut the steel bars first with the grinder, then the plastic with the jigsaw. The cut-out plastic piece became the door itself. I hinged it to the cage frame and added two barrel bolts that require two separate motions to open.
For ventilation I cut two openings high on opposite walls, each about 6 by 12 inches. I covered them with hardware cloth and secured everything with zip ties and screws. Cross ventilation matters more than people think. Ammonia builds up fast without it.
Installing Roosts and Nesting Boxes
I ran two sanded 2×2 bars across the width of the tote, high on the wall opposite the door. Hens need about eight to ten inches of roost space each. I made them removable so I could scrape droppings easily.
Nesting boxes went on the lower side wall. Two plastic crates lined with straw worked fine. One box per three or four hens is the rule I follow. I added a small lip so the bedding stayed put and hung a scrap of burlap as a privacy curtain. The hens took to them within a day.
Floor and Bedding Setup
The plastic floor is slippery when bare. I dumped in four to six inches of pine shavings. Deep litter method works well here. I add fresh shavings on top every few weeks and let the bottom layers compost. Full clean-outs happen twice a year. The plastic makes that job fast. Hose it out, let it dry, refill.
Making It Predator-Proof and Comfortable
Raccoons open simple latches like they were designed for them. I switched to double-action hardware on every opening. Hardware cloth went over every vent and gap. I extended a twelve-inch apron of the same mesh along the ground around the base. Digging predators hate that.
I oriented the door toward the morning sun. That keeps the interior drier and gets the hens laying earlier. In hot weather the plastic holds heat, so the high vents stay open year-round. In winter I never close them completely. A damp, still coop kills more birds than cold air does.
I later attached a simple hardware-cloth run to the cage frame itself. No extra posts needed. The metal cage already provides the strength.
Lessons I Learned the Hard Way
I cut the first door too high. Hens had to jump more than they liked. Lower is better.
I used regular chicken wire on the vents at first. A weasel proved why that was a bad idea. Half-inch hardware cloth fixed it permanently.
Ventilation felt optional until the first humid week. The smell told me otherwise. More openings beat fewer every time.
The metal cage is the real hero. Without it the plastic alone would not stop determined predators. Keep the cage intact and use it.
IMO the biggest surprise was how little maintenance this setup needs. Hose, scrape, add bedding. Done.
Frequently Asked Questions
How many chickens fit in an IBC container chicken coop? A standard 275-gallon unit holds four to six standard hens comfortably if you give them a small run. Bantams stretch that to eight or so. Stick to the four-square-foot rule per bird and you stay safe.
Do I need a food-grade IBC tote? Not strictly for a coop, but it is nicer if you can find one. Clean any used tote thoroughly either way. Avoid ones that held pesticides or solvents.
Will the plastic get too hot in summer? It can. High vents and a light-colored exterior paint help a lot. Shade from trees or a simple tarp over the top also works.
Can I make it portable like a chicken tractor? Yes. I know people who cut the bottom out and add wheels or just drag it. Mine stays fixed with a run, but the same materials work for a movable version.
How long does an IBC container chicken coop last? Mine is going strong after more than a year with almost no repairs. The cage and plastic both handle weather better than most wood frames.
I still walk out every morning and feel a little proud of the thing. It cost less than a weekend trip, kept my flock safe through storms and predators, and cleaned up easier than any wooden coop I have ever owned. If you have a small flock and a tight budget, grab a used IBC, set aside a Saturday, and build one yourself. Your hens will thank you with eggs. And you will thank yourself every time you skip another expensive store run.


