
I finally got tired of tossing kitchen scraps in the trash every week. My small patio setup needed something simple. So I built my own small compost bin DIY project last spring. It cost me less than a fancy coffee run. And it works better than I expected.
Honestly? I almost gave up before I started. I thought composting meant giant piles and stinky messes. Not for my little space. Then I tried this. Game over for the old excuses.
You know that feeling when your counter fills with banana peels and coffee grounds? Yeah. That was me every morning. I wanted black gold for my potted herbs without hauling bags of store dirt. This bin delivered it.
Why a Small Compost Bin DIY Makes Sense for Real Life
I live with limited outdoor space. A full backyard pile? Forget it. My patio is maybe 8 by 10 feet. Neighbors are close. Smells and pests were non-negotiable no-gos.
A small bin solved that. It sits in a shady corner. Holds just enough for my household of two. Processes scraps fast enough that I never overflow.
See, big systems intimidate beginners. I was one. This keeps it manageable. You add a little. Stir a little. Harvest a little. No overwhelm.
I picked a plastic storage bin route because it’s cheap and contained. Wire or pallets work for bigger spots. But for small? Plastic wins. IMO, it’s the smartest starter move.
Benefits hit me quick:
- Cuts trash volume: My garbage bag fills half as fast now.
- Free soil booster: My basil and tomatoes love the finished stuff.
- Feels good: Closing the loop on waste. Quiet win every time I dump scraps.
No lectures needed. Just practical payoff.
Gathering What You Need for Your Small Compost Bin DIY
I kept the supply list dead simple. No hardware store marathon. Most of this sat in my garage already.
Here’s exactly what I used:
- One 18- to 30-gallon plastic storage bin with a tight lid. Mine was a basic Rubbermaid from the thrift store. $5.
- A drill with a 1/4-inch or 3/16-inch bit. Any old cordless works.
- Dry leaves or shredded newspaper for the base. Free from the yard or recycling.
- A scoop of regular garden dirt or finished compost if you have it. Optional starter.
- Something to stir with. An old stick or small shovel.
That’s it. Total under $15 if you buy the bin new. I spent $8.
Skip fancy aerators or thermometers at first. You can add later. Start basic.
I chose a dark-colored bin. It absorbs a bit of heat. Helps the microbes. Light ones work too if that’s what you have.
Location matters more than you think. I put mine against the fence in partial shade. Full sun dries it out. Full shade slows it. Drainage underneath so water doesn’t pool.
Choose a bin with locking lid clips. Raccoons and other pests can easily pop off a simple snap-on lid.
Step-by-Step: Building My Small Compost Bin DIY
I did this in under an hour. Coffee still warm when I finished.
Prepping the Bin
Grab your bin. Flip it over. Drill 8 to 12 holes in the bottom for drainage and air. Space them out. Don’t go crazy. Too many and stuff falls through.
Then drill another 8 to 10 around the upper sides and in the lid. Airflow is everything. Compost needs oxygen. Without it you get slime and stink.
I lined the bottom holes with a bit of hardware cloth scrap I had. Optional. Keeps bigger bits in while letting liquid drain. Call it compost tea if you catch it. Dilute and feed plants.
Layering the Base
This part feels like making lasagna. But dirtier.
Dump in a 3- to 4-inch layer of browns first. Dry leaves. Shredded cardboard. Newspaper. Twigs if small. Browns are carbon. They balance the wet greens later.
Add a thin scoop of dirt on top. Introduces the good microbes. I used soil from a pot I was repotting. Worked fine.
Moisten lightly with a spray bottle or watering can. Damp like a wrung-out sponge. Not dripping.
Adding Your First Scraps
Now the fun. Greens go in. Fruit and veggie peels. Coffee grounds. Tea bags. Crushed eggshells. Grass clippings if you have them.
I started with whatever was in my kitchen caddy that day. Banana peels. Apple cores. Coffee. Covered them completely with more browns. Always bury the fresh stuff. Keeps flies and smells down.
Ratio I aim for: roughly 2 or 3 parts browns to 1 part greens by volume. Not exact science. If it smells rotten, add browns. If it’s dry and slow, add greens and a splash of water.
Stir everything. Mix the layers. Then lid it tight.
Done. Your small compost bin DIY is live.
What Goes In and What Stays Out
I learned this the hard way once. Tossed in some leftover cheese. Bad idea.
Good stuff (greens – nitrogen):
- Fruit and vegetable scraps
- Coffee grounds and filters
- Tea bags (paper ones)
- Fresh grass clippings
- Plant trimmings
- Eggshells (crushed)
Good stuff (browns – carbon):
- Dry leaves
- Shredded newspaper or cardboard (no glossy)
- Paper towels and napkins (unbleached if possible)
- Straw or hay
- Sawdust from untreated wood
- Dryer lint (natural fibers)
Keep these out:
- Meat, fish, dairy, oils. Attract pests and smell.
- Pet waste. Pathogens.
- Diseased plants.
- Weeds with seeds if your pile doesn’t get hot.
- Plastic, metal, glass. Duh.
- Citrus in huge amounts if you have worms later. Can be acidic.
I keep a small countertop container with a lid under the sink. Empty it into the outdoor bin every couple days. No fruit flies if I empty often and rinse.
Chop scraps into smaller pieces before adding. This gives microbes more surface area and speeds up decomposition.
Keeping Your Small Bin Happy Day to Day
Maintenance is light. That’s why I stick with it.
Every week or so I open it. Stir with my stick. Check moisture. Add water if dry. Add dry leaves if soggy.
Smell test: earthy is perfect. Sour or ammonia means too many greens or not enough air. Fix with browns and a good mix.
I turn more in warm months. Less in winter. The pile slows when cold. That’s normal. It restarts in spring.
Pests? My tight lid and buried scraps keep most away. Once a curious raccoon nosed around. I moved the bin closer to the house light. Problem solved.
If fruit flies show up, I bury scraps deeper and add a browns blanket on top. Works every time.
Temperature: I don’t obsess. If the middle feels warm, microbes are busy. Cool is fine for slow and steady.
Bury fresh kitchen scraps in the center of the pile rather than on top. It hides smells and speeds breakdown.
Harvesting Your First Batch of Black Gold
Patience. My first batch took about 3 months. Small bins finish faster than big piles sometimes because they heat and cool quicker. Or slower if neglected. Mine was ready when everything looked dark and crumbly. No recognizable peels. Smelled like forest floor.
I scooped the finished stuff from the bottom. Left some behind as starter for the next round. Mixed the new compost 50/50 with potting soil for my containers. Plants went nuts. Bigger leaves. More tomatoes.
If you want continuous supply, start a second small bin. Fill one while the other finishes. Or just keep adding to the top and harvesting bottom as ready. Lazy method. My preference.
Yield from my 20-gallon bin? Enough for several pots and a raised bed top-dress every season. Perfect scale.
Stop adding fresh material one week before harvesting. This allows the whole batch to finish maturing evenly.
Indoor Options If Patio Space Is Zero
I tried a mini version indoors one winter. Smaller bin under the sink. Same drill holes. Extra care on moisture and balance.
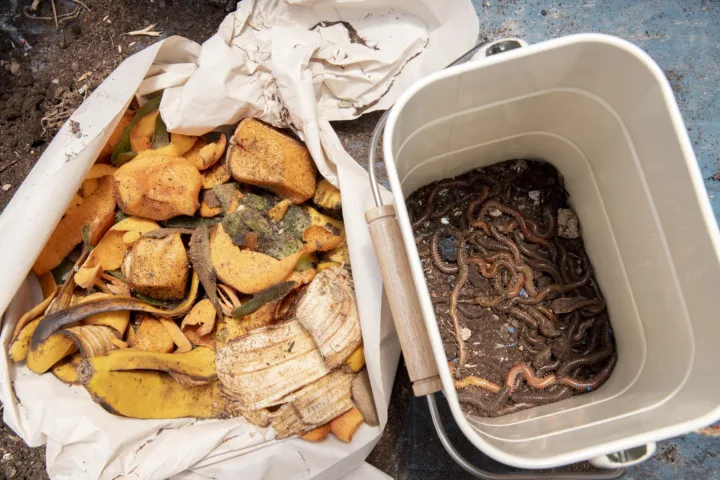
Worked okay for a while. Then I added red wiggler worms. Vermicomposting. Different game. Worms eat the scraps fast. Produce castings that are pure gold.
For pure indoor small compost bin DIY without worms: stick to dry browns heavy. Empty often into outdoor if you can. Or use bokashi (fermentation) buckets if you want no-smell anaerobic. I haven’t gone full bokashi yet. Maybe next.
Apartments love the plastic bin on a balcony. Just watch the drip. Put a tray underneath.
Common Mistakes I Made So You Don’t Have To
I overwatered once. Turned it into mud soup. Added dry cardboard like crazy. Saved it.
I ignored the lid seal. Flies moved in. Fixed with better coverage and tighter lid.
I added too many citrus peels. Slowed things. Now I limit them.
Biggest one: expecting instant results. Compost takes time. Microbes work on their schedule. I checked daily at first. Drove myself nuts. Now I peek weekly. Better for everyone.
See, the wrong question is “how fast can I get compost?” Right question is “how do I keep the balance so it just works?”
Balance wins.
Scaling Up or Tweaking Later
Once this clicks, options open. I might add a second bin next year. Or try a wire circle for leaf piles in fall.
Some folks drill a PVC pipe with holes down the center for passive air. Fancy. Not needed for small.
Tumbler style is cool if you want no-stir. But more expensive and bulkier. My static bin suits me fine.
If you have kids, involve them. Mine loves dumping the kitchen caddy. Teaches the cycle without lectures.
Frequently Asked Questions
How long does a small compost bin DIY take to make finished compost? Mine hit usable compost in 2 to 4 months depending on weather and how often I stirred. Warmer and more mixed equals faster. Cold slows it to 6 months or more. Just keep adding and balancing.
Can I really do a small compost bin DIY in an apartment with no yard? Yes. Balcony or even indoor with care. Use a smaller bin, manage moisture tightly, and empty finished compost into houseplants or community gardens. Many people do exactly this.
What if my small compost bin starts to smell bad? Add more brown materials right away and stir well for air. Smells mean imbalance, usually too wet or too green. Fix the ratio and it clears in a day or two. Never happened long-term for me once I got the hang.
Do I need worms for a successful small compost bin DIY? No. Regular hot or cold composting works great without them. Worms speed kitchen scraps and make castings, but bacteria and fungi handle the rest just fine in a basic bin.
How much space does a small compost bin DIY actually need? Mine takes about 2 square feet of floor space. A 20-gallon bin footprint. Easy to tuck beside a railing or against a wall. Smaller totes work for true micro setups.
I started this small compost bin DIY because I was sick of waste. Now it’s just part of the routine. Like watering plants. Simple. Satisfying.
You grab a bin. Drill some holes. Layer and go. That’s the whole secret. No perfection required. Messy first batches still turn into dirt eventually.
Try it this week. Your plants will thank you. Your trash can will look emptier. And you’ll get that quiet pride every time you dump the scraps instead of bagging them.
I still smile when I harvest a scoop. Who knew dirt could feel like winning?