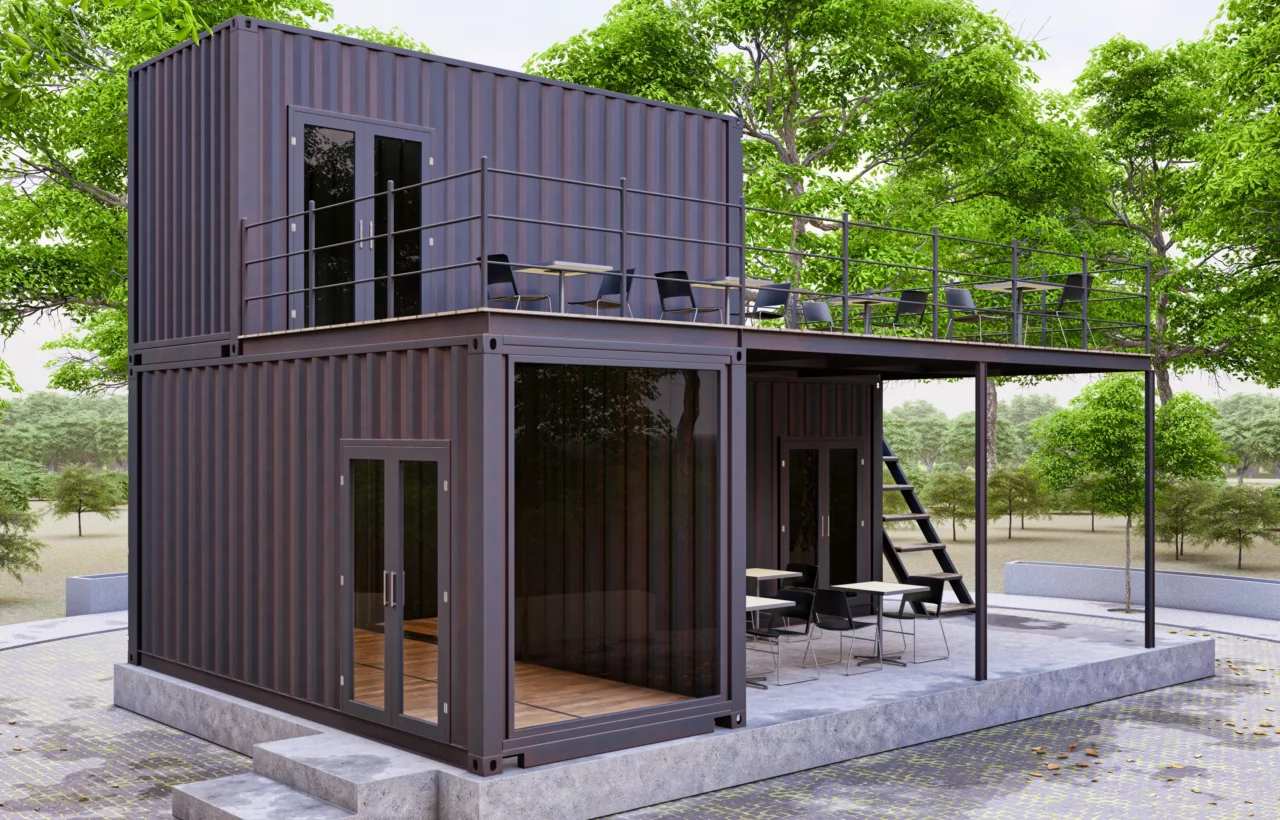

I spent months staring at the flat steel roof of my shipping container and wondering how to turn that empty space into something useful. A container terrace changed everything for me. I wanted outdoor seating without expanding the footprint on the ground, and this approach delivered exactly that.
Honestly? I almost talked myself out of it three times. The roof felt too thin. The idea of people walking up there made me nervous. Then I started researching modular platforms and structural frames that rest on the strong points of the container instead of the sheet metal. That shifted my thinking.
I live in a converted 20-foot container home on a small plot. Ground space is limited. Adding a container terrace on the roof gave me roughly 15 square meters of extra living area for seating, plants, and evening drinks. The process taught me a lot about load capacity, waterproofing, and simple modular systems. I’ll walk you through what worked, what I would change, and the practical steps that kept the project realistic.
Why a Container Terrace Made Sense for My Setup
Shipping containers already offer solid corner posts and top rails. Those structural members carry far more weight than the corrugated roof panels. I learned early that resting any deck directly on the thin roof metal leads to dents and leaks. So I focused on frames that transfer loads to the ISO corners and perimeter beams.
My main goals were simple:
- Extra outdoor space without buying more land
- Quick assembly that I could handle with basic tools and one helper
- Removable design in case I ever move the container
- Safe railings that meet basic height rules
I chose a modular steel platform sized for a standard 20-foot unit. Many commercial kits use high-strength steel and lock onto the corner castings with twist locks. No welding. No drilling into the roof itself. That preserved the original watertight seal, which mattered to me.
See, the alternative was a full custom welded frame. That route costs more and requires a fabricator on site. The modular route let me order a ready platform, lift it into place with a small crane, and finish the decking myself. IMO that balance of cost and control works best for most people starting out.
Check local planning and fire-access rules before ordering, because a removable terrace may still count as a permanent elevated structure.
Planning the Load and Layout Before Buying Anything
I measured the container carefully and checked local rules for outdoor platforms. Most residential setups aim for a live load around 250 kg per square meter. That covers people, furniture, and light planters without drama. Some event-grade systems go higher, but I stayed in the private-use range.
Key numbers I wrote down:
- Platform size: 6058 mm by 2438 mm to match the container
- Target payload: 250 kg/m²
- Railing height: at least 1100 mm
- Access: side stairs with a small landing so the full roof stayed usable
I sketched two options. One full rooftop cover. One partial terrace that left space for solar panels later. I went with the full cover because I wanted maximum seating. The partial idea still sits in my notebook for a future second container.
Weather played a big role. Rain needs a slight slope so water runs off. Snow load in my area stays modest, but I still confirmed the frame rating. Wind mattered too. The railings had to stay secure without turning into a sail.
Don’t rush the planning phase. I spent two full weekends just measuring and comparing kits. That time saved me from ordering the wrong size.
A 20 m² terrace rated at 250 kg/m² allows 5,000 kg total live load, excluding the platform and decking weight.
Choosing the Frame, Flooring, and Safety Gear
I looked at mild steel frames, galvanized options, and composite decking boards. Steel won for strength and the ability to bolt sections together if I ever twin two containers. Galvanizing or polyurethane paint keeps rust away.
For the walking surface I picked non-slip composite boards. They stay cooler than bare metal in summer and drain well. Some people use aluminum checker plate. It works, but it feels industrial. I wanted a warmer look.
Railings came as optional modules on most kits. I ordered the removable style so I could fold them down for transport if needed. Stairs arrived as a straight kit with a landing platform. That landing kept the stairs from eating into the terrace floor space.
Bold takeaway: always buy the frame first and match the flooring and railings to it. Mixing brands creates fit problems.
I also added simple LED strip lights under the handrail and a couple of planters along one edge. Nothing fancy. Just enough to make the space feel finished.
How I Actually Installed the Container Terrace
Installation day felt intense. The platform weighed about 850 kg, so I hired a small crane for the lift. Two friends helped guide it. We locked the twist locks onto the ISO corners in under an hour once the platform sat level.
Next came the secondary joists. They rest on the main frame and stay clear of the original roof sheet. That gap protects the container and creates a small air space. I screwed the composite boards across the joists with stainless fasteners. The boards run the short direction so water sheds easily toward the long sides.
Railings clipped on with simple pins. Stairs bolted to the side of the container using existing corner points. Total hands-on time after the crane left: one full day plus a morning of finishing touches.
I tested everything by walking the full surface with two other adults and a couple of chairs. No bounce. No creaks. Solid.
Honestly? The hardest part was waiting for the crane. Everything else felt straightforward once the heavy piece sat in place.
Mistakes I Almost Made and How I Dodged Them
I nearly ordered a frame that sat directly on the roof corrugations. That would have dented the metal within a month. Research saved me. Always support from the strong perimeter and corners only.
Another close call: skipping the slight slope. Flat surfaces collect water. I used thin shims under one long edge to create a 1–2 percent fall. Simple and effective.
Waterproofing details matter. I sealed every penetration around the stair attachment with quality exterior sealant. I also kept the original roof membrane intact by never drilling through it.
Cost surprises hit some people. A basic modular platform plus railings and stairs runs several thousand euros or dollars depending on location and finish. My total landed near the lower end of the 8,000–18,000 euro range often quoted for a finished 20 m² terrace because I handled the decking myself.
Budget for the crane or forklift. That day rental adds up but prevents damage and injury.
Across the 2,438 mm container width, a 1 to 2 percent fall equals roughly 24 to 49 mm of height difference.
Living with the Finished Container Terrace
Six months in, the space works better than I expected. Morning coffee up there feels private. Evening gatherings stay comfortable because the railings give a sense of enclosure without blocking views. Plants in lightweight pots thrive because I can move them for sun or shade.
Maintenance stays low. I sweep the boards and check the twist locks twice a year. The galvanized finish still looks clean. No leaks into the container below.
I use the terrace for more than seating. A small table holds tools when I work on the roof solar setup. Guests love the elevated view. The extra square meters changed how the whole property feels.
If you run an event space or a mobile bar, the same modular idea scales well. Two 20-foot platforms can bolt together for a longer run. Folding railings make transport realistic.
After relocating a platform or adding a second one, recheck twist locks, bolted joints, railing pins, and stair attachments before reopening it.
Frequently Asked Questions
Does a container terrace damage the shipping container? No, not when you use a frame that locks to the ISO corners and keeps weight off the thin roof panels. I preserved full watertightness this way.
How much weight can a typical container terrace hold? Most modular systems rate for 250 kg per square meter. That covers normal residential use with people and furniture. Check the specific kit rating before you order.
Can I install a container terrace myself? You can handle the decking and railings, but lifting the main platform needs a crane or heavy forklift. I hired help for that one step and finished the rest with friends.
Is a container terrace worth the cost? For me, yes. The added usable space on a tight site paid off in daily enjoyment and occasional entertaining. Compare the price to buying extra ground area or a separate structure.
Do I need planning permission for a container terrace? Rules vary by location. I checked with my local authority before ordering. Some places treat it as a minor addition if it stays within height limits and does not alter the ground footprint.
Final Thoughts from the Roof
I started with an empty steel roof and ended with a favorite outdoor room. The container terrace gave me space I could not create any other way on this plot. The key stayed simple: support the load properly, keep water moving, and choose modular pieces that fit standard containers.
If you own a shipping container and feel short on outdoor area, measure your roof, check the load numbers, and look at the locking systems that avoid permanent changes. The project rewards careful planning more than fancy tools.
I still climb the stairs most evenings just to stand up there for a few minutes. That quiet elevated spot remains the best part of the whole conversion.


