
If you’ve been thinking about composting but keep getting stuck on what the actual bin should look like, where it should go, or whether it’s going to become an ugly, smelly problem in your garden, I completely understand, because the right setup can make the whole process feel either surprisingly simple or way more complicated than it needs to be.
These 12 compost bin ideas cover everything from neat wooden designs that blend into a backyard to compact options for smaller spaces, along with a few clever setups that make turning, filling, and accessing your compost much easier. This isn’t a step-by-step building guide, but you’ll see exactly what makes each idea practical, which designs are better for certain spaces, and what details are worth thinking about before choosing one.
Because honestly, a compost bin doesn’t need to look messy or take over your garden, and once you find a design that actually suits your space and routine, composting becomes so much easier to stick with.
How to implement it immediately
-
Pick a bin style that fits your space, like a lidded tote, wooden pallet box, tumbler, or under-sink bucket.
-
Add ventilation holes on the sides and drainage holes on the bottom to prevent odors and soggy compost.
-
Layer kitchen scraps with dry materials like leaves, shredded cardboard, or paper.
-
Keep the mix slightly damp, then turn or stir it once a week.
-
Place the bin somewhere easy to access but shaded from strong sun and heavy rain.
Why I Bothered With All These Compost Bin Ideas
My first year I dumped everything in a corner. Raccoons loved it. The pile never heated up. I felt defeated. See, the problem was not the scraps. The problem was the container. Or the lack of one. Once I matched the bin to my space and how much time I actually had, things changed. Compost showed up. Plants perked up. I stopped buying bags of soil.
I still mess up ratios sometimes. Brown materials run low in winter. Green scraps pile up in summer. These bins forgive that. They give me room to learn without the whole yard turning into a science experiment gone wrong.
My 12 Compost Bin Ideas Ranked by Real Use
I tested each one. Some I built once and kept. Others I rebuilt after the first version collapsed. Here is what stuck.
The author rebuilt several bins after structural failures, so prioritize sturdy materials like pallets or thick plastic over cheap wire fencing.
1. The Basic Pallet Bin
I grabbed four free heat-treated pallets from a local warehouse. Screwed them into a square. Done in under an hour. Air flows through the gaps. Rain drains out the bottom. I leave the front open or add a simple gate from another pallet piece. This one holds a solid cubic yard. Perfect starter for anyone with a bit of yard space. I still use mine for leaf piles in fall. Cost me zero dollars. IMO it beats any store bin for pure function.
2. Three-Bin Pallet System
Once the single bin filled up, I expanded. Seven pallets total. Two dividers create three sections. One for fresh scraps. One for the active pile. One for finished material ready to spread. I turn with a pitchfork every couple weeks. The system keeps the process moving without me hauling finished compost across the yard. I built this against a fence so the back stays stable. It looks rough. It works hard. My garden beds get a steady supply now.
3. Chicken Wire Cylinder
I unrolled a ten-foot length of chicken wire. Formed a three-foot circle. Tied the ends with wire. That is the whole build. It costs almost nothing and sets up in minutes. I drop kitchen scraps and yard waste straight in. The open sides give perfect airflow. When the pile is ready I just lift the wire cylinder off and move it. The finished compost stays in place. I use this for pure leaf mold. Fast. Light. Easy to hide behind shrubs.
4. Plastic Trash Can with Holes
I drilled about thirty holes in the sides and bottom of an old thirty-two gallon can. Set it on a couple bricks so liquid drains. The locking lid keeps raccoons out. I roll the whole thing around the yard every few days to mix. This one fits tight spaces. I keep it near the back door for quick scrap dumps. It processes slower than a big pile but stays contained. No mess. No smell if I balance greens and browns.
5. Storage Tote Composter
Same idea as the trash can but smaller. An eighteen-gallon plastic tote with holes drilled all around. I stack two for extra volume. This lives on my patio. Perfect for apartment-style living or tiny yards. I add shredded paper and coffee grounds from the kitchen. Shake it once a week. Finished material comes out the bottom holes or I dump the whole tote. Cheap. Portable. Quiet.
6. DIY Barrel Tumbler
I found a clean food-grade plastic drum. Mounted it on a simple wooden frame with a metal rod through the middle. Drilled air holes. Added a door cut from the side. Now I spin it a few turns every other day. Mixing happens without a pitchfork. The batch finishes in about a month when the weather cooperates. I keep this one for pure kitchen scraps. Less yard space needed than a stationary pile. My arms thank me.
7. Wooden Slat Bin
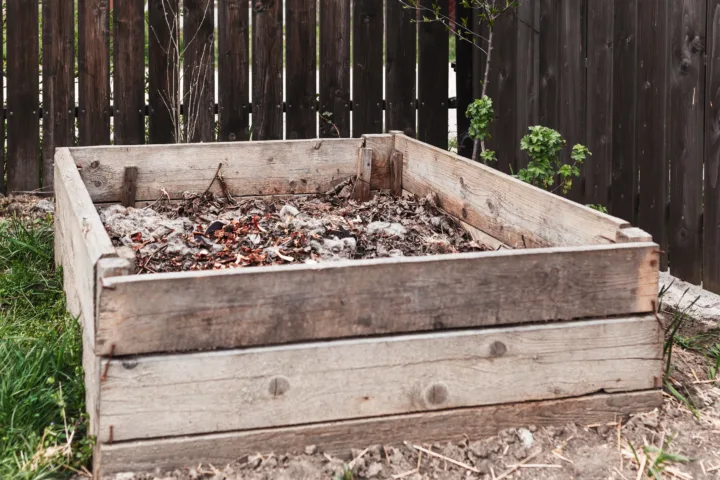
I used untreated cedar fence pickets for this one. Built a rectangular frame about three feet by three feet. Left gaps between the slats for air. One side lifts out for easy access. The wood holds up for years if you keep it off direct soil contact. I like the look better than pallets. It blends into the garden. I fill it with a mix of grass clippings and cardboard. Steady producer.
8. Straw Bale Enclosure
Four straw bales form a square. I stack a second layer if I need height. The center becomes the compost pile. The bales themselves break down slowly and add carbon. At the end of the season I just fork everything into the garden beds. Zero waste from the bin itself. Great for one-season use or if you already buy straw for mulch. I tried this when I had extra bales after a garden project. It worked better than expected.
9. Concrete Block Bin
I stacked cinder blocks three high in a U shape. No mortar. The gaps between blocks give airflow. I can remove blocks later to change the size or open a side. Critters stay out better than with wire. The mass of the blocks holds heat. My hot pile got going faster in this setup. Heavy to move but permanent once placed. I put it in a shady corner so it never dries out too quick.
10. In-Ground Worm Bin
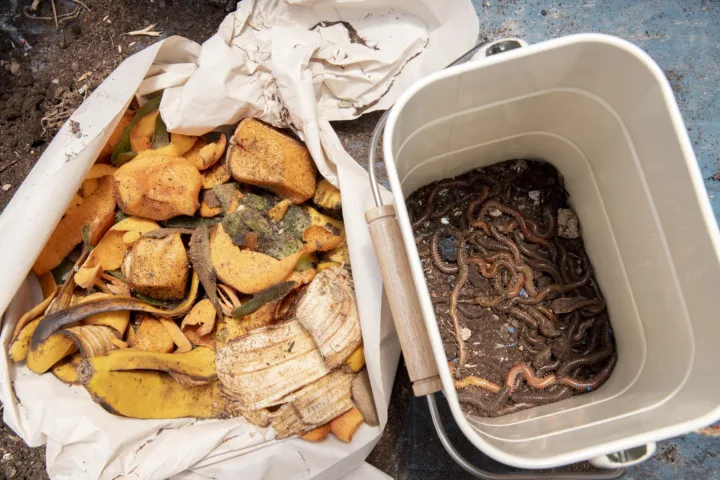
I buried a plastic bin with the bottom cut out and sides drilled full of holes. Filled it with bedding and red worms. Kitchen scraps go in the top. Worms and soil microbes do the rest. Nutrients leak straight into the surrounding soil. I place these in raised beds. The plants right next to them grow noticeably stronger. Volume stays small but the quality is high. I maintain two of these now.
11. Five-Gallon Bucket Vermicomposter
For the absolute smallest spaces I use nested five-gallon buckets. Drill holes in the top bucket. Add worms and scraps. The bottom bucket catches liquid I dilute for fertilizer. This sits under my kitchen sink or on a balcony. I empty it every few weeks into the garden. No yard required. The process stays contained and mostly odor-free when I avoid citrus and onions in large amounts.
12. Simple Compost Trench
I dig an eighteen-inch deep trench between rows in the vegetable garden. Layer scraps and cover with soil. Next season I plant right over the spot. No bin to build. No turning. The soil does the work underground. I do this in fall for spring beds. It keeps the surface tidy and feeds the soil exactly where plants will grow. Best for people who hate extra structures in the yard.
How I Choose Which Bin to Use
Space decides first. Tiny patio means tote or bucket. Full backyard opens up pallets and blocks. Time comes next. Tumblers need less daily effort. Stationary bins need occasional turning. Budget sits last because most of these cost under twenty dollars if I scavenge materials.
I run three systems at once. The three-bin pallet for bulk yard waste. The trash can for daily kitchen scraps. The worm buckets for high-quality castings. They feed each other. Leftover material from one goes into another. Nothing sits unused.
Moisture stays the biggest variable. I water dry piles. I cover wet ones. Airflow prevents the anaerobic smell that made me quit the first time. Balance greens and browns and the bins stay happy.
Frequently Asked Questions
What are the easiest of these 12 compost bin ideas for complete beginners? The chicken wire cylinder and the plastic trash can with holes. Both take under thirty minutes and need almost no tools. I started with the trash can and never looked back.
Can I use these 12 compost bin ideas in a small apartment? Yes. The storage tote, five-gallon bucket, and countertop collection methods work on balconies or even indoors if you manage moisture carefully. I kept a tote on a third-floor patio for two full seasons.
How long until I get usable compost from these setups? Hot piles in the three-bin or tumbler finish in four to eight weeks with regular turning. Cool methods like the trench or wire cylinder take three to six months. Worm bins produce continuous castings after the first month.
Do I need special tools to build most of these? A drill and a few screws handle the pallet and wooden versions. Wire cutters work for the mesh. Many need nothing more than a shovel. I built the first three with tools I already owned.
What should I avoid putting in any of these bins? Meat, dairy, oily foods, and pet waste attract pests and create odors. I stick to fruit and vegetable scraps, coffee grounds, eggshells, leaves, and cardboard. That keeps every bin clean and working.
Final Thoughts From My Own Yard
These twelve setups turned my scrap problem into a soil solution. I no longer haul bags of compost from the store. My plants get free food. The process feels less like a chore and more like part of the garden routine. Start with one that matches your space. Build it this weekend. Fill it. Wait. Watch what happens. The first time you spread your own finished compost you will understand why I kept going after those early failures. The dirt tells the truth better than any article. Go make some.