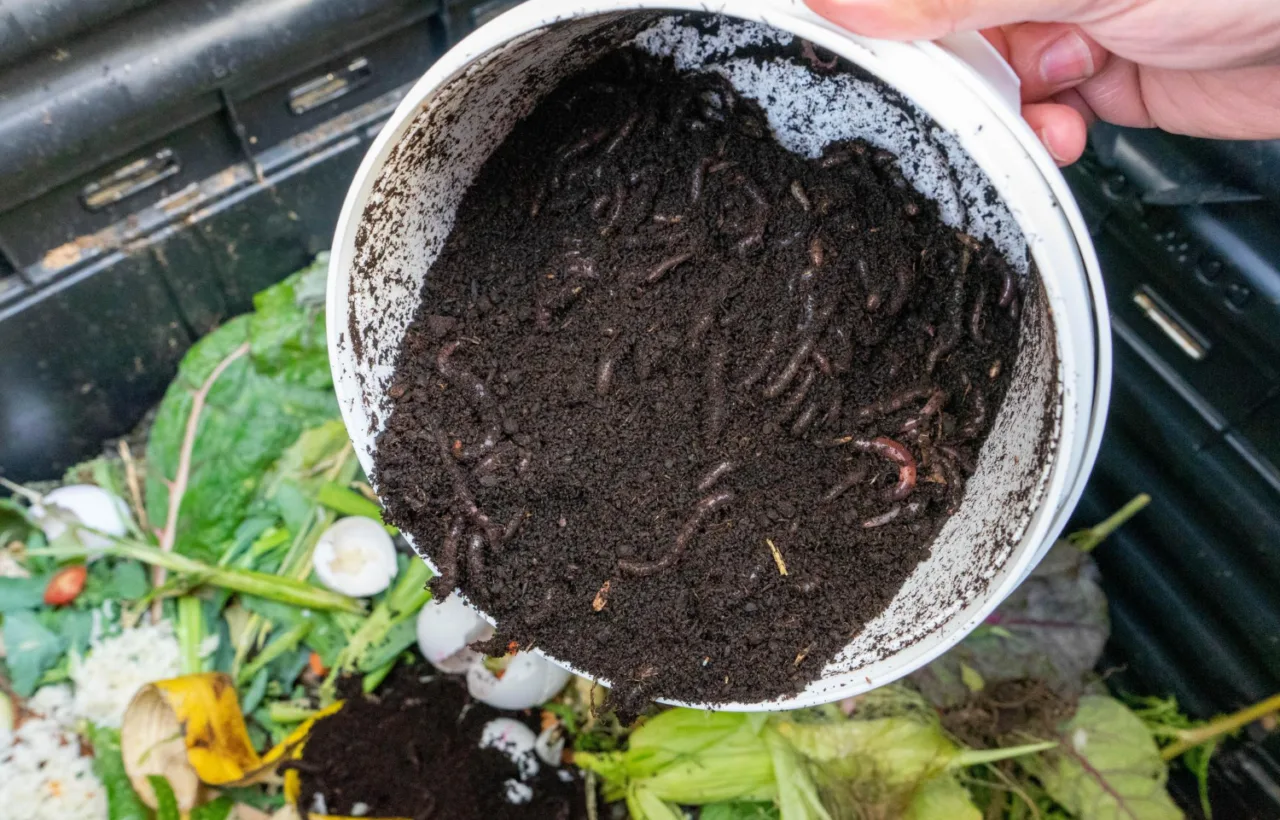

I built my first diy worm compost bin on a rainy Saturday when my kitchen scraps started piling up faster than I could haul them out. Honestly? I was tired of the smell and the guilt. I wanted something cheap, indoor-friendly, and actually useful. So I grabbed two plastic bins, a drill, and a pound of red wigglers. That little setup changed how I handle waste forever.
See, most people think worm composting needs a fancy store-bought system or a big backyard. I think that’s the wrong way to go about it. You don’t need perfection. You need a working diy worm compost bin that fits your space and your life. Mine cost under ten bucks and sits quietly under my sink. The worms do the heavy lifting. I just feed them and harvest the castings.
This guide walks you through exactly how I did it. Materials. Steps. Feeding. Harvesting. Troubleshooting. Everything I learned the messy way so you skip the failures.
Why I Chose a DIY Worm Compost Bin Over Buying One
I almost bought a commercial worm farm. The slick ads promised no smell and easy harvests. Then I checked the price. Over sixty dollars for plastic trays I could build myself. Honestly? No thanks.
My diy worm compost bin gave me control. I picked the size. I chose the materials. I fixed problems on the spot. Plus, the castings? Pure black gold for my tomato plants. My peppers doubled in size the first season I used them. The liquid that drains out makes incredible fertilizer tea too.
Benefits I noticed right away:
- Zero food waste going to landfill. My scraps vanish.
- Year-round indoor composting. No freezing winters or summer flies outdoors.
- Kid-friendly science project. My nephew still asks to “check the wormies.”
- Free fertilizer. Castings beat store-bought stuff every time.
IMO, if you cook at home and grow anything, this setup pays for itself in one growing season.
Gathering the Right Materials for Your DIY Worm Compost Bin
I kept it simple. No exotic tools. Just stuff from the hardware store or already in my garage.
Here’s exactly what I used:
- Two opaque plastic storage bins (8–10 gallons each). Dark colors only. Light freaks worms out.
- One lid that fits the top bin.
- A drill with 1/4-inch and 1/16-inch bits.
- Shredded newspaper or cardboard for bedding. Avoid glossy or colored ink.
- A handful of garden soil for grit.
- One pound of red wiggler worms (Eisenia fetida). Not nightcrawlers. Red wigglers live in the top layers and eat like crazy.
- Kitchen scraps to start them off.
- Optional: Fine mesh screen and waterproof glue if you want extra pest protection.
Total cost for me: about $8 plus the worms. I found the bins on clearance. Worms came from a local gardener who had extras. Online works too if you order ahead.
Pro tip from my first fail: Make sure the bins nest snugly. The bottom one catches liquid. The top one holds the action.
Drill extra 1/16-inch holes near the top of the upper bin for airflow; worms need oxygen to thrive.
Step-by-Step: How I Built My DIY Worm Compost Bin
I finished the whole build in under thirty minutes. Let’s break it down.
Prepping the Bins
I started with the top bin. That’s the living quarters.
- Drill about twenty 1/4-inch holes evenly across the bottom. These let excess liquid drain and give worms a path to migrate later.
- Drill two rows of 1/16-inch holes along each long side near the top for air. Worms need oxygen. Stale air kills them.
- Drill thirty small holes in the lid. Same 1/16-inch bit.
- Shake out every plastic shaving. Nobody wants worms choking on debris.
The bottom bin stays solid. No holes. It just sits underneath as a catch tray. I elevate the whole stack on a couple of bricks so air flows underneath and I can slide the tray out easily.
Making the Bedding
Bedding is the worms’ home and first meal. Get this right or they bolt.
I shredded a full newspaper into one-inch strips. Dumped them in a bucket. Soaked them until soggy. Then squeezed hard until they felt like a wrung-out sponge. Too wet and you get anaerobic stink. Too dry and worms desiccate.
I layered three to four inches of that damp paper into the top bin. Fluffed it up. Tossed in a handful of soil. Mixed lightly. Done.
Some people add leaves or coco coir. I stuck with newspaper because I always have it. Works great.
Adding the Worms and First Food
I set the bin in a quiet corner of my kitchen, away from direct sun and heaters. Ideal temp sits between 55 and 77 degrees Fahrenheit. My spot hovers around 68.
Then I dumped the pound of red wigglers right on top of the bedding. They looked sluggish at first. Totally normal. I left them alone for a day to settle.
Next morning I buried a cup of chopped veggie scraps in one corner. Banana peels. Coffee grounds. Apple cores. Covered everything with more damp paper. Lid on. Lights off.
That was it. My diy worm compost bin was live.
Feeding and Daily Care: Keeping My Worms Happy
I feed once a week. Collect scraps in a sealed container during the week. Chop big pieces. Avoid meat, dairy, oily stuff, and heavy citrus. Those cause smells or kill worms.
I bury the food in a different spot each time. The worms follow it around. Cover completely. Exposed food invites fruit flies. I learned that the hard way after one forgotten melon rind.
Moisture check every few days. Stick a finger in. Should feel like a damp sponge. Dry? Mist with water. Wet? Add dry shredded paper and mix.
I keep a light cardboard sheet on top of the bedding. Worms love it. It also blocks light and helps hold moisture.
FYI: One pound of worms can process about half a pound of scraps per day once established. Start slow. Overfeeding is the number one newbie mistake.
Freeze your scraps overnight before adding them; it breaks cell walls, speeds decomposition, and kills fruit fly eggs.
Harvesting the Castings Without Losing My Mind
After three months my bin was full of dark, crumbly castings. Time to harvest.
I use the migration method because it’s cleaner.
- Stop feeding for a week.
- Push all contents to one side.
- Add fresh bedding and food to the empty side.
- Wait one to two weeks. Worms move to the new food.
- Scoop out the finished castings from the old side.
I also tried the dump-and-sort method once with my nephew. Spread everything on a tarp under bright light. Worms dive deep. Skim the top layer. Repeat. Messy but fun. Kids love it.
The liquid in the bottom tray is worm tea. I dilute it 10:1 with water and pour it on my houseplants. They go wild for it.
Use worm tea within 24 hours of collection; after that it goes anaerobic and can burn plant roots.
Common Problems I Fixed (So You Don’t Have To)
My first bin almost failed twice. Here’s what went wrong and how I fixed it.
Smelly bin: Too wet or too much food. I added dry bedding, mixed well, and stopped feeding for ten days. Smell vanished.
Fruit flies: Exposed food. Now I bury everything deep and keep the cardboard cover on.
Worms trying to escape: Usually too wet, too dry, or wrong temperature. Check conditions. They settle once it’s right.
Slow eating: Food pieces too big or bin too cold. I started chopping finer and moved the bin away from the drafty window.
Not enough worms later: They multiply based on food. Keep feeding consistently and the population grows.
See? Most issues reverse quickly if you catch them early.
Scaling Up: When My Single Bin Wasn’t Enough
After six months my scraps outgrew the first setup. I added a second perforated bin on top. Same hole pattern. Fresh bedding and food. Stacked it right on the old surface. Worms migrated up through the holes. Genius.
Now I run a three-bin stack. Bottom catches liquid. Middle holds mature castings. Top is active. Harvest by pulling the middle one when it’s ready. Rotate. Super efficient for a family of four.
If you want wood instead of plastic, some folks build with plywood. I stuck with plastic because it’s cheap, easy to clean, and light enough to move.
Frequently Asked Questions
How long does it take for a diy worm compost bin to start producing castings? Most bins show usable castings in two to three months if you start with a full pound of worms and feed regularly. Mine hit peak production around month four.
Can I keep a diy worm compost bin outside? You can in mild climates, but I keep mine inside. Extreme heat or cold kills worms. A garage or basement works if temperatures stay stable.
What if I go on vacation? Feed a bigger meal right before you leave and add extra bedding. Healthy bins handle two weeks fine. Longer trips? Ask a friend to check moisture.
Do diy worm compost bins smell bad? Only if you mess up moisture or overfeed. A well-run bin smells like fresh earth. Mine never stinks.
Where do I buy red wigglers for my diy worm compost bin? Local garden clubs, farmers markets, or online suppliers. Start with one pound. They double every few months under good conditions.
Final Thoughts From My Kitchen Floor
I started this project because I hated wasting food. I ended up with freer fertilizer, happier plants, and a weird affection for red wigglers. My diy worm compost bin sits there quietly turning banana peels into soil magic while I sleep.
You don’t need special skills. You don’t need a big budget. You just need two bins, some paper, and the willingness to get a little dirty. Build it this weekend. Feed it your scraps. Watch the worms work.
Honestly? Once you harvest that first handful of castings and mix them into a pot, you’ll wonder why you waited so long. Go make one. Your garden (and your trash can) will thank you.


