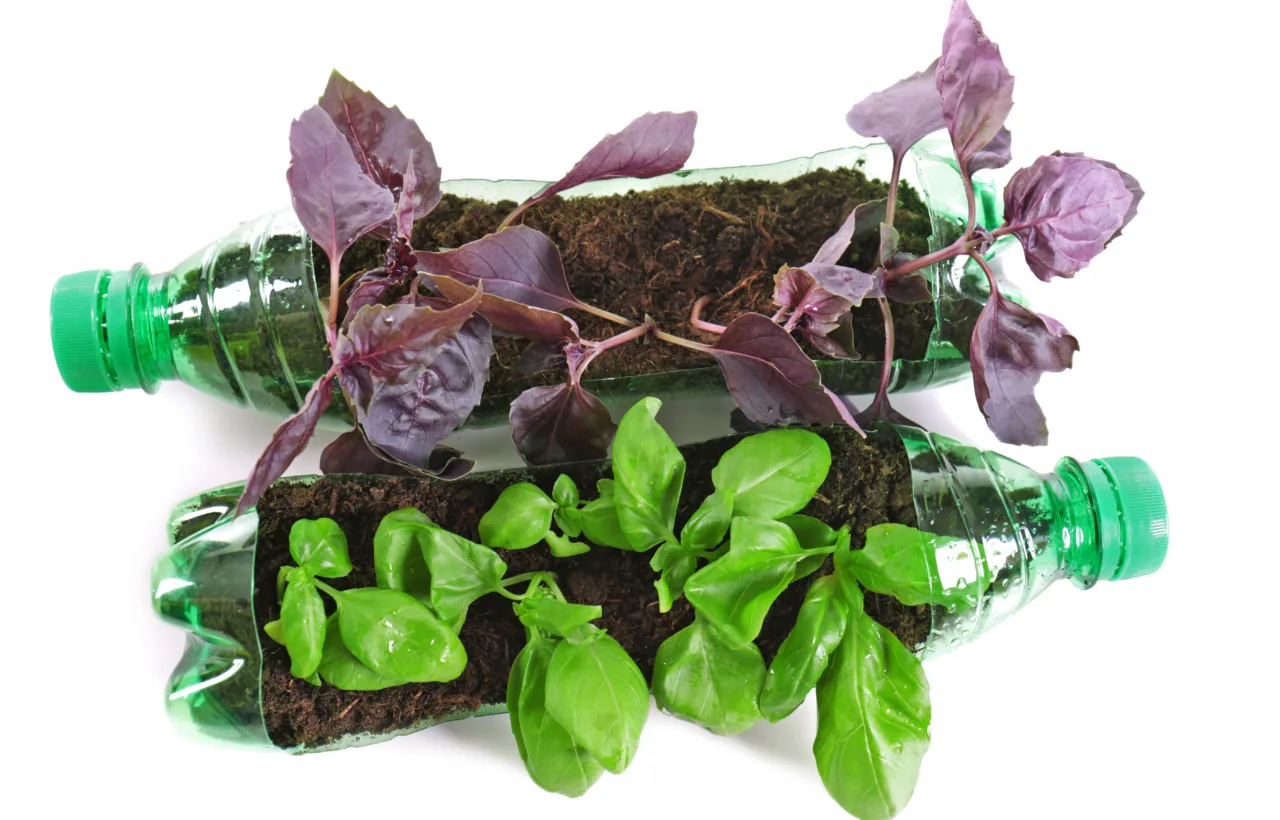

I started making compost in a bottle last spring when my tiny apartment balcony left me zero room for a regular bin. Kitchen scraps piled up fast. I hated tossing them. So I grabbed an empty 2-liter soda bottle and turned it into my own mini compost factory. Honestly? It worked better than I expected. This method gives you rich, crumbly compost in a couple of months without smelling up the place or taking over your kitchen. Perfect if you live in a flat, want a science project with kids, or just need a low-effort way to recycle food waste. I’ll walk you through exactly how I do it, what went wrong the first time, and how you can copy the whole thing this weekend.
Why I Bothered With Compost in a Bottle at All
Space was my biggest enemy. My balcony holds two pots and a folding chair. A traditional compost pile? Not happening. I tried a store-bought countertop bin once. It stank after three days. I nearly quit.
Then I saw a school experiment version online. Clear plastic bottle. Layers of scraps and dirt. Visible breakdown. I thought, why not scale that up for real use?
The benefits hit me right away:
- Zero outdoor space needed. I keep mine on a sunny windowsill.
- Complete visibility. You watch the magic happen. Mold turns into soil. Fascinating.
- Kid-friendly and cheap. Costs nothing beyond scraps you already have.
- Faster than outdoor piles in my experience. Heat builds inside the bottle. Stuff breaks down in 8-12 weeks.
IMO, this beats buying bagged compost every season. You control what goes in. No mystery chemicals. And you reuse plastic that would otherwise hit the recycling (or worse).
I failed my first attempt. Too much wet banana peel. It went slimy. Smelled like regret. Lesson learned. Balance is everything. Greens and browns. Moisture just right. Stick with me and you’ll skip that mess.
Start with a thin layer of browns at the bottom to prevent liquid pooling and bad smells.
What You Actually Need to Start Your Own Compost in a Bottle
Gather these before you cut anything. I keep a dedicated drawer now so I never hunt.
.
- One clear 2-liter plastic bottle (soda or water works). Clear is key so you see the progress.
- Sharp scissors or a craft knife.
- Garden soil or potting mix (a handful or two). Avoid sterile stuff if possible. Live microbes help.
- Kitchen scraps: fruit peels, veggie ends, coffee grounds, crushed eggshells. Chop them small.
- Brown materials: shredded newspaper, cardboard bits, dry leaves, or torn paper towels. No glossy junk.
- A bit of water (tablespoon at a time).
- Sticky tape or packing tape.
- Optional: a pin or nail for air holes, permanent marker for labeling.
That’s it. No fancy tools. I use whatever sits in my junk drawer. FYI, skip meat, dairy, oily stuff, and citrus in big amounts. They attract pests or slow things down.
Cut the bottle in half and hinge it with tape for easy filling and harvesting.
My Step-by-Step Method for Building Compost in a Bottle
I refined this over three bottles. The third one produced perfect black gold. Follow these layers and you’ll get the same.
Prep the Bottle First
Rinse the bottle. Peel off the label so you can watch inside. Cut the top off about 10 cm down from the neck. Leave a little hinge of plastic if you want easier sealing later. Some people poke drainage holes in the bottom with a hot pin. I do three or four small ones. Prevents swamp conditions.
Set the top aside. You’ll tape it back later.
Layer Like a Pro
This is the heart of it. Alternate greens (nitrogen-rich wet stuff) and browns (carbon-rich dry stuff). Soil in between kicks off the microbes.
- Start with 2-3 cm of soil at the bottom.
- Add 2-3 cm of chopped kitchen scraps (greens). Banana peels, apple cores, carrot tops. Keep pieces under 2 cm.
- Sprinkle another thin soil layer.
- Top with browns: shredded paper or dry leaves. About the same thickness.
- Repeat the green-soil-brown cycle until the bottle is almost full. End with soil on top.
I aim for roughly equal greens and browns by volume. Too many greens and it goes anaerobic (stinky). Too many browns and it sits there forever.
Mist with a little water as you go. The whole mix should feel like a wrung-out sponge. Not dripping. Not dusty.
Seal, Label, and Place It
Pop the top back on. Tape the seam tightly all around. Draw a line with marker at the current fill level. You’ll watch it shrink. Satisfying.
Park the bottle in a warm, bright spot. Windowsill works. Avoid direct scorching sun that cooks it dry or freezing cold that stalls everything. Room temperature is ideal.
How I Keep My Bottle Compost Happy Over the Weeks
Patience matters here. But not blind patience. Check weekly.
Open the top every 7-10 days. Give the contents a gentle stir with a long spoon or chopstick. Adds oxygen. Aerobic microbes love air. They work faster and smell better.
Watch the moisture. If it looks bone dry, add a teaspoon of water and stir. If it’s slimy or has standing liquid, mix in extra shredded paper or dry leaves. Close it back up.
I take a quick photo every two weeks. Side-by-side shots show the shrinkage and color change. From colorful scraps to dark, earthy soil. Kids go wild for this part. Adults too, if I’m honest.
Temperature inside rises a bit. That’s good. Means the microbes are feasting. If your bottle feels warm, celebrate.
Use a temperature strip on the bottle to monitor microbial activity.
Troubleshooting the Common Screw-Ups I Made
First bottle: pure greens. Became a stinky swamp in ten days. Fixed it by dumping half out, adding browns, and starting over.
Second bottle: too dry. Nothing moved for a month. I misted it and shook gently. Took off again.
Other fixes I learned:
- Fruit flies appear. Tape better. Or bury fresh scraps deeper under soil and browns.
- White mold shows up. Normal at first. It’s part of the breakdown. If it turns black and fuzzy and smells rotten, open and aerate more.
- Nothing happens after four weeks. Chop scraps smaller next time. Add a pinch of finished compost or soil from outside as a starter.
- Bottle tips over. Set it in a small plant pot or jar for stability.
Most problems fix with balance and air. Don’t panic. Open, adjust, reseal.
If you see black mold and smell rotten eggs, this indicates anaerobic conditions. Open and stir immediately.
When and How I Harvest My Finished Compost
Ready time sits between 8 and 12 weeks for me. Depends on temperature and how fine I chopped everything. You’ll know it’s done when:
- Volume dropped by about a third (check your marker line).
- Color is dark brown or black.
- Texture looks like crumbly soil. No big recognizable chunks left.
- Smell is earthy, like a forest floor. Never sour or rotten.
Cut the bottle open or dump it out. Spread the compost on a tray to dry a day if it’s damp. Then use it.
I mix mine into potting soil for houseplants. Half compost, half regular mix. My basil exploded. Tomato seedlings loved it. You can top-dress outdoor pots too. Just don’t use pure compost for seedlings. Too rich sometimes.
One bottle gives me enough for two or three medium pots. I run two bottles staggered so I always have some ready.
Real Talk: How This Compares to Other Small-Space Options
I tried a few alternatives. Worm bin (vermicompost). Cool but needs more care and space for the tray system. Smelled if I overfed. Cost me $40 to start.
Store-bought bokashi bucket. Ferments instead of composts. Fast, but you still bury the pre-compost outside or in a bigger bin. Not ideal for pure apartment life.
Outdoor tumbler. Great if you have a yard. I don’t.
Bottle method wins for pure simplicity and cost. Zero dollars after the first soda. Visible science. Portable. If it fails, toss the contents in the green bin and restart. No big loss.
Downside: volume is small. One bottle won’t feed a whole garden. I accept that. For balcony herbs and a couple of veggies, it’s perfect. Scale up with more bottles if needed.
Extra Tips From My Third Successful Bottle Onward
Chop everything tiny. Surface area speeds microbes. I use kitchen shears right over the bottle.
Add coffee grounds and crushed eggshells regularly. They boost nutrients and balance pH.
In winter I move the bottle closer to a radiator (not on it). Speeds things a bit.
Label with start date. Helps track.
If you want faster results, add a spoonful of finished compost or a commercial accelerator to the top soil layer. I skip it usually. Nature works fine.
Share progress with friends. I sent weekly photos to my sister. She started her own. Contagious in the best way.
Frequently Asked Questions
How long does compost in a bottle really take? In my warm apartment it finishes in 8-12 weeks. Cooler spots stretch to 4 months. Stir and moisture checks keep it on track.
Can I put meat or dairy in my compost bottle? No. I tried a tiny bit of cheese once. Bad idea. Attracts flies and smells awful. Stick to plant scraps, coffee, eggshells, and paper.
Does compost in a bottle smell bad? Only if you mess up the balance. Mine stays neutral or earthy. Proper greens-to-browns ratio and weekly airing prevent odors completely.
Is this safe for kids to help with? Absolutely. I let my niece layer the scraps. Adult handles the cutting. They love checking the shrinkage every week. Great hands-on science.
What do I do if my bottle gets too wet or too dry? Too wet: mix in dry paper or leaves and leave the top open an hour. Too dry: mist lightly and reseal. Adjust once and it usually stays balanced.
Final Thoughts From One Bottle Convert to Another
I almost gave up after that first slimy disaster. Honestly? Glad I didn’t. Now I run two bottles year-round. Kitchen waste drops to near zero. Plants look happier. I feel a quiet pride every time I scoop that dark compost into a pot.
You don’t need a big yard or fancy gear. Just one bottle, some scraps, and a bit of patience. Start this weekend. Cut the top. Layer the goods. Tape it shut. Watch the transformation.
Your future plants will thank you. And you’ll never look at a banana peel the same way again. Go make your own compost in a bottle. Messy first tries still beat doing nothing.


