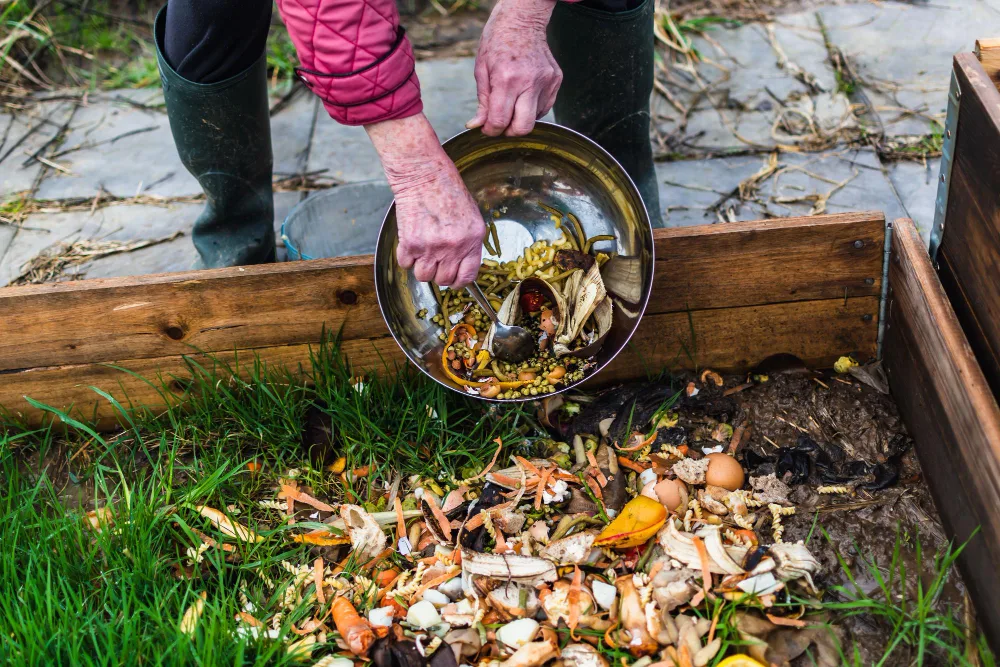

I built my first compost pile in a corner of the backyard last spring. It failed hard. The whole mess turned into a slimy, stinky disaster that attracted every raccoon in the neighborhood. That flop taught me one clear lesson: compost design makes or breaks the entire process. You need a smart setup from day one if you want rich soil instead of a science experiment gone wrong.
Honestly? I spent weeks reading forums and watching videos before I got it right. Now my system churns out black gold every season. You can do the same. This guide walks you through everything I learned the messy way so you skip the failures.
Why Smart Compost Design Saves You Time and Hassle
Bad design creates more work. Good design almost runs itself. I used to turn my pile every other day because heat never built properly. Then I redesigned the whole thing. Overnight the temperature hit 140 degrees and stayed there.
See, compost thrives on balance. Air, moisture, carbon, and nitrogen all need space to dance. A poorly planned bin chokes that dance. Your kitchen scraps sit there and rot anaerobically. Smell city.
I fixed mine by focusing on three basics:
- Airflow first: Without oxygen the microbes die.
- Moisture control: Too wet and you get soup. Too dry and nothing happens.
- Size that works: Big enough for heat, small enough to manage.
These three points changed everything for me. My current setup needs turning once a week max. The rest takes care of itself.
Key Elements Every Compost Design Needs
You cannot wing this part. Skip one element and the whole system suffers. I learned that after my second bin collapsed under its own weight. Emb.
Structure and Materials
Wood works great if you seal it. I built mine from untreated cedar pallets. Cheap and sturdy. Plastic bins hold moisture better but trap heat unevenly. Wire mesh lets air scream through but dries out fast in summer.
My go-to now combines both. Wooden frame with wire sides. Best of both worlds.
Location Matters More Than You Think
I stuck my first pile right against the fence. Bad call. No sun. No access. Now I place every system in a spot that gets morning light and stays out of full afternoon bake. Drainage underneath is non-negotiable. I dug a slight slope and layered gravel. Water never pools.
Size and Capacity
Small bins look cute. They fail for real volume. I aim for at least 3x3x3 feet. That cube holds heat. Anything smaller stays cold. Larger works if you have space and a pitchfork strong enough for the job.
Popular Compost Design Options I Actually Tested
I tried five different setups over two years. Here is the honest rundown. No fluff. Just what worked and what flopped.
Open Pile Design
Simplest start. Just heap everything on the ground. I did this first. Free and flexible. Downside: pests and mess. Rain turned it into mud. Raccoons threw a party.
It works if you live rural and mind the aesthetics. Urban folks skip this one.
Wooden Bin Systems
My current favorite. Three-bin setup. One for fresh scraps. One for active cooking. One for finished gold. I built it in a weekend with scrap lumber. Cost under $50.
The design lets me flip material easily. Airflow stays perfect. Looks tidy enough that neighbors stop asking questions.
Tumbler Designs
I bought a fancy dual-chamber tumbler. Spun it religiously. Compost finished faster. Then the gears stripped. $200 down the drain. Tumblers suit apartments or tiny yards. They struggle with big volumes though. IMO the spinning gets old fast.
Worm Bin Variations
Vermicompost design changed my indoor game. Red wigglers eat scraps under the kitchen sink. No smell if you balance the bedding. I started with a plastic tote. Added holes. Layered newspaper and coco coir. Harvest every three months.
Great for apartments. Not a full yard solution.
Hot Compost Systems
These hit high temps fast. I modified a wire cage with insulation panels. Kitchen waste plus grass clippings rocket to 160 degrees. Pathogens die. Weed seeds die. Finished compost in four weeks instead of six months.
Requires more monitoring. Worth it when you need soil quick.
Step-by-Step Guide to Building Your Own Compost Design
I will walk you through the exact process I use now. Follow it and you avoid my early disasters.
First grab these materials:
- Four wooden pallets or cedar boards
- Wire mesh or hardware cloth
- Landscape fabric
- Screws and hinges
- Gravel for base
Clear a 4×8 foot area. Level it. Spread two inches of gravel. That drains excess water.
Build the frame. Stand three pallets upright in a U shape. Screw them together. Add the fourth as a removable front. Hinge it if you want easy access.
Line the inside with wire mesh. Staple it tight. This keeps critters out while letting air in.
Add landscape fabric on the bottom if roots worry you. Otherwise skip it.
Start layering. Browns first: leaves, cardboard, straw. Then greens: food scraps, grass. Keep a 3:1 brown-to-green ratio. Water until it feels like a wrung-out sponge.
Cover with a tarp or lid in heavy rain. Leave sides open for air.
Turn every five to seven days. Use a pitchfork. Move outer material to the center. That is the whole system.
I finished my first proper batch in eight weeks. Dark. Crumbly. Smelled like forest floor. Perfect.
Use a 3/8 inch hardware cloth instead of 1/2 inch to keep out mice and voles while still allowing airflow.
Common Mistakes That Ruin Compost Design
I made every single one. Learn from my pain.
Too much green material. My early piles smelled like a dumpster. Balance the browns.
No airflow. I packed everything tight once. Anaerobic mess. Always leave gaps or add pipes for vents.
Wrong location. Shade plus rain equals swamp. Sun plus wind equals desert. Find the middle.
Ignoring size. Tiny bins never heat. Giant ones need a tractor to turn. Stick to the cube rule.
Giving up too soon. Compost looks ugly for weeks. Then magic happens. Stick with it.
Advanced Tips for Better Results
Once the basics click you can level up. I added these tweaks last year and cut finishing time in half.
Install PVC pipes with holes vertically through the pile. Instant air channels.
Mix in finished compost as a starter. Speeds the microbes.
Monitor temperature with a cheap probe. Below 110? Add greens or turn. Above 160? Add browns or water.
Collect rainwater for moisture. City water has chlorine. Rain does not.
Store finished compost in bins with lids. Keeps it ready for spring planting.
These small changes make the difference between average and excellent soil.
Seasonal Adjustments for Year-Round Compost Design
Winter nearly killed my system once. Freezing temps stopped everything. Now I insulate with straw bales around the outside. Keep a smaller active pile going indoors with worms.
Summer brings heat and flies. I cover fresh scraps with browns immediately. Add more carbon. Shade cloth helps on scorchers.
Fall is leaf bonanza. I stockpile them dry. Perfect brown material all year.
Spring kickstarts everything. I empty finished bins and start fresh. Timing feels natural once you live it a full cycle.
Frequently Asked Questions
What is the best compost design for beginners? A simple three-bin wooden system works best. It teaches the process without fancy parts. I started there and never looked back.
How long does compost design take to produce finished material? With a hot system you get usable compost in four to eight weeks. Cold piles take three to six months. Temperature and turning decide the speed.
Can I use compost design in a small apartment? Yes. Worm bins or compact tumblers fit under sinks or on balconies. I ran one in a studio for a year with zero issues.
Does compost design attract pests? Poor design does. Secure lids, buried scraps, and proper browns keep rats and raccoons away. My current setup has never had a visitor.
How do I know my compost design is working? It heats up, shrinks, and smells earthy. If it stinks or stays cold you adjust air or moisture. Trust the process.
Final Thoughts on Getting Started
I went from failed piles to reliable soil factories by treating compost design like any other craft. Plan it. Build it. Tweak it. The reward hits every time I scoop that dark crumbly stuff into garden beds. Plants explode with growth. Weeds drop. Watering drops. Everything feels easier.
Start small this weekend. Grab some pallets. Follow the steps above. Your first batch will teach you more than any article. Then refine. That is how I got here. You will too.
The soil under your feet will thank you. Your plants will thank you. And honestly? You might just get hooked like I did.


