
I spent years dumping kitchen scraps into a sad little pile behind the shed. It smelled. It attracted flies. And half the time it just sat there like a wet brick. Then I finally built a proper 3 bin compost system diy setup. Everything changed overnight.
Honestly? I wish I’d done it sooner. That single project turned my backyard waste into a steady stream of dark, crumbly compost that makes my tomatoes look like they belong in a magazine. And I did the whole thing with free pallets, a drill, and one Saturday afternoon.
If you’re tired of single-bin frustration or just want a system that actually keeps up with a real garden, you’re in the right place. I’m walking you through exactly how I built mine, what worked, what didn’t, and how I use it every week.
Why a 3 Bin Compost System Beats Everything Else
See, a single pile or one lonely bin forces you into a stop-and-start mess. You add stuff. You wait forever. You dig out finished compost while fresh scraps are still in there. Total chaos.
A three-bin setup fixes that cold.
I keep one bin for fresh greens and browns. The middle bin holds the active pile I’m turning and cooking. The third bin stores finished compost ready for the garden. Continuous flow. Always something ready. Always room for more waste.
The benefits hit hard:
- Hot composting becomes easy. The mass in each bay holds heat better.
- Turning feels manageable. I just fork material from one bay into the next.
- Pests stay lower. Finished stuff sits sealed away from the fresh stuff.
- Capacity jumps. My system handles everything from two households plus yard clippings.
I used to buy bagged compost. Now I give bags away. That feels good.
A three-bin system can produce finished compost in 18 days with proper management, compared to 6-12 months for a passive pile.
Choosing Materials for My DIY 3 Bin Compost System
I went the free-and-easy route first. Pallets. Everyone has them or can get them. Grocery stores, garden centers, warehouses. Just ask. Most places are happy to hand them over.
But not every pallet works. I look for heat-treated ones (stamped HT). Avoid the chemical-treated ones with that weird green tint. Those leach stuff you don’t want near food gardens.
Hardwood pallets last longer. Oak or maple beat pine every time. Pine rots faster. Cedar would be dream wood if I were buying new, but free hardwood pallets get the job done for years.
Here’s exactly what I used for my first build:
- 7 standard wood pallets (same size, roughly 4×4 feet)
- A box of 3-inch exterior screws
- A drill and impact driver
- Optional: hardware cloth for the bottom and backs if rodents are bold in your area
- A tarp or scrap corrugated roofing for lids
Total cost: under $20 for the screws. Everything else was free.
If you want something that lasts a decade, buy cedar 2x4s and 1x6s. The Wisconsin Extension plans use that route. Sturdy. Pretty. Pricey. My pallet version cost almost nothing and still works great after four seasons.
Never use pallets marked MB (methyl bromide) near edible gardens; they contain toxic fumigants.
Step-by-Step: How I Built the Frame
I picked a level spot near the garden but not right against the house. Good drainage. Easy water access. Out of the worst wind.
First I laid three pallets flat for for the back wall. Side by side. Then I stood two more upright for the outer ends. Screwed them tight to the back pallets at the corners. Two more pallets became the dividers. Stood them up between the ends and screwed everything solid.
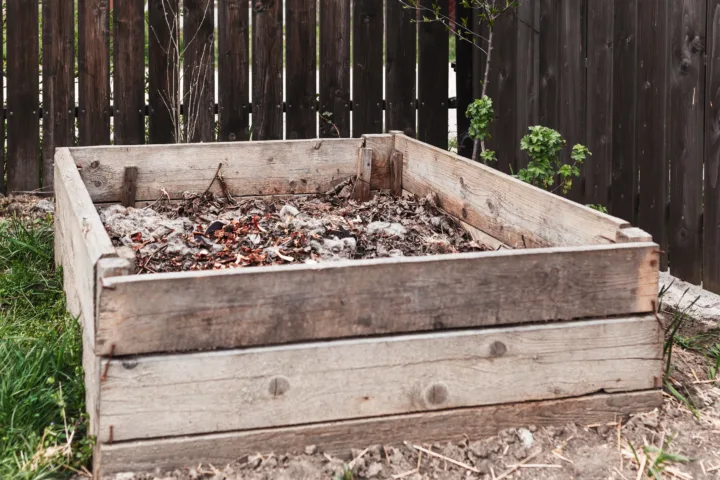
That gave me three open-front bays, each about 3.5 to 4 feet wide and deep. Perfect size for hot composting. Anything smaller struggles to heat up. Anything much bigger gets hard to turn.
I added front slats that slide in and out. Just screwed vertical runners on the front edges of the dividers and ends, then cut pallet boards to drop in. When I need to empty a bay, I pull the boards out one by one. No more digging over a tall wall.
For the bottom I left it open to the ground. Worms and microbes move up freely. If you have serious rodent issues, staple hardware cloth across the floor first.
Lids matter. I made simple ones from leftover corrugated plastic and old hinges. Keeps rain from drowning the pile and keeps the heat in. On dry weeks I leave them cracked open so moisture can get in.
The whole build took me about three hours with a buddy holding things. Solo it might take half a day. No fancy skills required. If you can drive a screw, you can do this.
How I Actually Use the Three Bins Day to Day
This part is the magic.
Bin 1 (left): Fresh stuff only. Kitchen scraps, grass clippings, shredded leaves, coffee grounds, eggshells. I layer browns and greens roughly 2:1 or 3:1 by volume. Keep it moist like a wrung-out sponge. Cover with a tarp or cardboard.
When Bin 1 is full and has cooked for a few weeks (it should feel warm inside), I fork the whole pile into Bin 2. That’s the active turning bay. I mix it thoroughly as I move it. Add water if it’s dry. More browns if it’s slimy.
Bin 2 sits and cooks. I turn it into itself every week or two by forking it over. Temperature climbs. Steam rises on cold mornings. Beautiful.
When Bin 2 cools down and looks dark and crumbly, I move it to Bin 3. Finished storage. I screen it if I’m feeling fancy, then shovel it straight into beds or bags.
Meanwhile Bin 1 gets filled again. The cycle never stops.
I check moisture with my hand. Too dry? Hose it. Too wet? Add dry leaves or cardboard. Smell bad? More browns and a turn. Simple.
Test moisture by grabbing a handful: it should feel damp but not dripping; if it clumps, it's good.
Common Mistakes I Made (So You Don’t Have To)
I built my first version too small. Bays under 3x3x3 feet barely heated. Lesson learned.
I used treated pallets once. Bad idea. Smelled weird. Switched to HT only.
I skipped lids the first winter. Rain turned everything to soup. Added lids the next spring and never looked back.
I put it too far from the kitchen. Lazy days meant scraps sat in a bucket too long. Move it closer if you can.
And I overcomplicated the front. Fancy hinged doors look cool but jam with wet wood. Sliding slats win every time.
Maintenance Tips That Keep My System Humming
Once a month I walk the outside and tighten any loose screws. Wood swells and shrinks.
I keep a pile of dry leaves or shredded cardboard right next to the bins. Instant browns when greens get heavy.
In winter I pile extra leaves or straw around the outside for insulation. The core still cooks.
Every spring I empty Bin 3 completely, hose everything down, and start fresh. Takes an hour and feels like a reset.
Pests? Hardware cloth on the bottom and a tight lid handle most of them. I never put meat, dairy, or oily stuff in outdoor bins anyway. Those go to the chickens or the municipal green bin.
Scaling It Up or Down
My current setup feeds a big vegetable garden plus flower beds. If you have a tiny yard, build three smaller wire-and-stake bins or buy modular cedar units that link together. Same principle.
If you compost for a community garden or small farm, add a fourth bay or just make each bay bigger. The rotation stays the same.
I know people who run two separate three-bin systems. one for pure yard waste and one for kitchen stuff. Overkill for most of us. One solid system is plenty.
Frequently Asked Questions
How long does it take to get finished compost from a 3 bin compost system diy setup? With good turning and the right mix I pull finished stuff in 6 to 12 weeks during warm weather. Cooler months stretch it to 3 or 4 months. Hot composting in the middle bay is the key.
Do I need a bottom on the bins? I leave mine open to the soil. Worms and microbes thank me. If gophers or rats are aggressive in your area, staple ½-inch hardware cloth across the floor first.
What’s the ideal size for each bay? Aim for at least 3 feet by 3 feet by 3 feet. That volume holds heat. My bays sit closer to 4x4x3.5 and heat up beautifully.
Can I build this without power tools? Yes. Use a hand saw and a screwdriver if you must. It just takes longer. A cordless drill makes life so much easier though.
Is cedar really worth the extra money over free pallets? If you want something that looks polished and lasts 15-plus years, yes. For pure function and almost zero cost, free hardwood pallets win. I’ve run both. Pallets get the job done.
Final Thoughts From My Backyard
I started this project because my old pile embarrassed me. Now neighbors stop by just to look at the bins and ask how I keep up. I point at the three bays and shrug. It’s not magic. It’s just a simple system that works with how compost actually wants to behave.
Build it messy if you have to. Use what you have. Start turning. In a few months you’ll be spreading black gold and wondering why you waited so long.
Grab some pallets this weekend. Your garden will thank you. And so will your trash can.