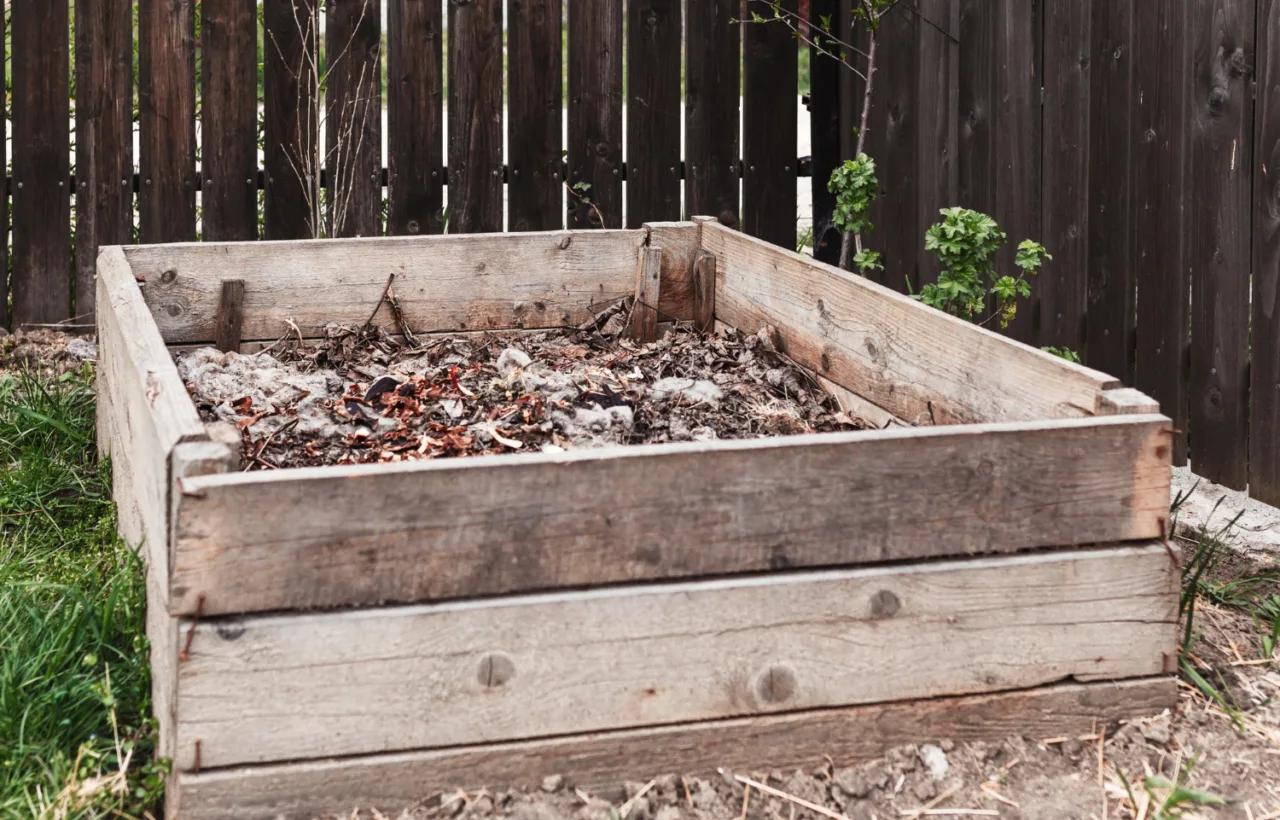

I wasted years tossing kitchen scraps in the trash. Honestly? It felt wrong every single time. Then I finally built my own homemade compost bin diy setup in one afternoon, and it changed how I garden forever. No fancy store-bought tumbler. No complicated blueprints. Just stuff I already had or grabbed for almost nothing. If you want free fertilizer for your plants and less garbage, this is the way.
I started small because big projects scare me off. My first try was a plastic tote. It worked. Later I upgraded to pallets. Both beat buying something expensive that sits unused. You can do this too. Let’s walk through exactly what I did, what worked, and what I messed up so you skip my mistakes.
Why I Bothered With a Homemade Compost Bin DIY in the First Place
My garden soil was sad. Hard. Lifeless. Store compost cost real money, and I hated hauling bags. Kitchen waste piled up. Yard clippings too. I needed a system that turned that mess into black gold without turning my backyard into a dump.
See, composting is not rocket science. Microbes do the heavy lifting. You just give them a home, some air, moisture, and the right mix of stuff. I wanted something cheap, quick, and ugly-proof so neighbors would not complain. My homemade compost bin diy checked every box.
I almost quit before starting. The internet made it look hard. Perfect ratios. Fancy wood. Turns out most of that is optional. Messy works. I proved it.
The Three Homemade Compost Bin DIY Styles I Actually Tried
I tested three approaches. Each has strengths. I will tell you which one I still use most and why.
Avoid bins smaller than 3 feet across. A small pile rarely heats up enough to kill weed seeds or break down quickly.
The Plastic Tote Method (My First Win)
This one took me under an hour and cost about ten bucks. Perfect starter.
Here is what I grabbed:
- One 30-gallon plastic storage bin with a tight lid
- A drill
- Some dry leaves or shredded paper
- A bag of dirt or finished compost if you have it
Steps I followed:
- Drill 8-10 holes in the bottom for drainage and air.
- Drill another 8-10 in the lid and sides.
- Layer dry leaves or cardboard on the bottom about a quarter full.
- Add a few inches of dirt.
- Dump in kitchen scraps. Cover them with more browns.
- Mist with water until damp like a wrung-out sponge.
- Snap the lid on and set it in a shady spot.
I stirred it with a stick every week or two. In three months I had usable compost. Not a ton, but enough for my pots. Critters stayed out because of the lid. Smell stayed minimal when I balanced greens and browns.
Downside: It fills fast if you cook a lot. And plastic can get brittle after a few years in sun. Still, for beginners this homemade compost bin diy rules. IMO it is the lowest barrier entry.
The Pallet Bin (My Current Favorite)
Once I got hooked I wanted more volume. Pallets are free if you know where to look. Hardware stores, warehouses, or Craigslist often give them away. Look for HT stamped ones. Heat-treated, not chemically treated.
I used seven pallets for a three-bay setup. One bay for fresh stuff, one for cooking, one for finished. That rotation keeps me from waiting forever.
How I built it:
- Level a spot on bare dirt. Open bottom lets worms crawl in.
- Stand three pallets for the back wall. Screw them together with deck screws.
- Add side walls and two dividers the same way.
- Optional: Add a front gate or removable boards so you can pile high without spill.
I finished the basic frame in twenty minutes with a neighbor holding things. Then I added extra slats from a spare pallet to close bigger gaps. Done.
This homemade compost bin diy holds serious material. Manure, leaves, grass, kitchen scraps. All of it. I turn piles by forking from one bay to the next. Heat builds. Breakdown speeds up. My plants go crazy for the result.
One warning: Pine pallets rot faster. Cedar or oak last longer. I got lucky with mixed hardwoods.
The Wire Circle (Lazy Genius Option)
When I felt extra lazy I made a simple cylinder from coated wire fencing. Unroll enough for a four-foot diameter circle. Wire the ends together. Stake it with rebar. Drop a perforated pipe in the middle for air if you want.
Line the inside with twigs or cardboard so small bits stay put. Pile stuff in. Finished compost works its way out the bottom as you add to the top. Zero turning required if you are patient.
I love this for leaf season. Cheap. Almost invisible once plants grow around it. But it can look messy if you overfill. And raccoons sometimes investigate if you leave food scraps exposed.
What Goes In My Homemade Compost Bin DIY (And What Stays Out)
Balance matters. Too many greens and it smells. Too many browns and it sits forever.
Greens (nitrogen):
- Fruit and veggie scraps
- Coffee grounds and filters
- Fresh grass clippings
- Tea bags
- Plant trimmings
Browns (carbon):
- Dry leaves
- Shredded cardboard or paper
- Twigs
- Sawdust (untreated)
- Straw
I aim for roughly two or three parts browns to one part greens by volume. Not exact science. I eyeball it. If it smells funky I bury more browns. If nothing happens I add greens and water.
Never add:
- Meat, dairy, or oils (attracts pests and stinks)
- Pet waste
- Diseased plants
- Weeds with seeds if your pile does not get hot
- Glossy paper or treated wood
I keep a small lidded bucket under the sink for kitchen scraps. Empty it every couple days. Easy habit.
Freeze your kitchen scraps before adding them to the bin. Ice crystals break cell walls, speeding decomposition and reducing odors.
Location Matters More Than You Think
I put my first bin too close to the house. Bad idea. Occasional fruit flies. Now everything sits twenty feet away in partial shade. Close enough that I actually use it. Far enough that I ignore it most days.
Bare dirt underneath is best. Drainage. Worms. Microbes. Avoid concrete or plastic bottoms unless you drill extra holes.
Sun speeds things up but dries the pile. Shade keeps moisture. I split the difference. Morning sun, afternoon shade works great for me.
How I Keep My Pile Happy Without Babying It
Moisture: Damp, not soggy. Squeeze a handful. A few drops should come out. Rain usually handles it. Dry spells get a hose.
Air: Holes, wire, or turning. I turn bigger piles every few weeks with a pitchfork. Smaller tote gets a stir.
Size: Bigger piles heat better. Ideal is at least three feet cubed. My pallet bays hit four feet. They cook.
Time: Tote took three to six months. Hot pallet piles finish in two to three months if I stay on top of turning. Cold piles take longer. I am fine either way. Compost happens.
I check readiness by look and smell. Dark. Crumbly. Earthy. No recognizable scraps. Cool to the touch. Ready.
Common Mistakes I Made (So You Skip Them)
I added too many grass clippings once. Slimy mess. Fixed it with cardboard and leaves.
I forgot water during a heat wave. Pile stalled. Lesson learned.
I used a bin without enough holes. It went anaerobic and stank. Drilled more. Problem solved.
I started too small and got frustrated waiting. Bigger is better once you commit.
See, most problems fix with browns, water, or air. Rarely fatal.
Tools and Cost Breakdown From My Builds
Plastic tote route:
- Bin: $8-15
- Drill bits: already owned
- Total under $20 easy
Pallet route:
- Pallets: free
- Screws: $5
- Optional hardware cloth for lining: $20 if you want pest-proof
- Total can be zero if you scavenge well
Wire route:
- Fencing scrap: free or $10
- Rebar: $10
- Done
I spent more on coffee than on any of these. Seriously.
My Real Results After Two Years
My garden beds exploded with growth the first season I used homemade compost. Tomatoes bigger. Flowers brighter. Soil softer. Water held better. I stopped buying bags entirely.
Yard waste and kitchen scraps dropped by half in the trash. Feels good. Neighbors started asking questions. I showed them the tote version. Two of them built their own the next weekend.
Honestly? The best part is the quiet satisfaction of closing the loop. Waste becomes food for plants that feed me. Full circle.
Tips If You Live in an Apartment or Tiny Yard
Balcony tote works if your building allows. Or join a community garden compost. Some cities pick up scraps now. But if you have even a patio, the tote method still wins. Keep it sealed. Empty tea often if you collect it.
I know people who do worm bins indoors. I have not tried that yet. Maybe next winter.
Frequently Asked Questions
How long does a homemade compost bin diy take to make finished compost? It depends on size, materials, and how often you turn it. My tote gave me usable stuff in about three months. Hot pallet piles finish faster, sometimes eight weeks.
Will my homemade compost bin diy smell bad? Only if you overload greens or let it get too wet. Keep the balance and bury scraps. Mine smells like forest floor most days. Nothing foul.
Can I start a homemade compost bin diy in winter? Yes. Activity slows in cold but does not stop. I keep adding and wait for spring heat to finish the job. Or bring a small tote into a garage.
Do I need worms for my homemade compost bin diy? No. They show up on their own if the bottom is open to soil. Nice bonus but not required. Microbes handle the real work.
What is the cheapest homemade compost bin diy I can make today? Wire fencing circle or free pallets. Both can cost nothing if you scavenge. Start there.
Final Thoughts From Someone Who Almost Never Started
I dragged my feet for years. Thought I needed perfect conditions. Perfect tools. Perfect knowledge. Wrong. I just needed to start messy.
Build the simplest homemade compost bin diy you can this weekend. Toss in some scraps. Walk away. Check back in a month. You will smile when you see dirt forming.
Your garden will thank you. Your trash bill might drop. And you get to feel a little smug every time you dump coffee grounds instead of bagging them.
I still turn my piles on Sunday mornings with coffee in hand. Simple ritual. Best decision I made for the yard. Go make yours.


