
I stalled on composting for two solid years. Honestly? I thought it required fancy tumblers, perfect ratios, and a backyard the size of a football field. Then I finally built my own simple compost bin DIY for beginners last spring, and everything clicked. My kitchen scraps stopped filling the trash. My garden beds got free black gold. And the whole setup cost me under twenty bucks and one lazy Saturday afternoon.
If you’re staring at a pile of banana peels and wondering where to start, this is the exact path I took. No fancy tools. No garden-center markup. Just real results from a real beginner who still messes up the greens-to-browns ratio sometimes.
Why I Finally Ditched the Store-Bought Bin Idea
Store bins look sleek. They also cost $80–$150 and often sit empty because they feel intimidating. I walked past those plastic tumblers for months. Then I watched my neighbor’s free pallet setup outproduce every shiny bin on the block.
See, the real barrier isn’t skill. It’s overthinking. I needed something dirt-cheap, quick to build, and forgiving of my half-hearted turning schedule. A basic DIY bin checked every box. Once I had one sitting in the corner of the yard, the habit stuck. Scraps went in. Guilt went out.
That’s the beauty of a compost bin DIY for beginners. You start small. You learn by doing. And you get usable compost faster than you expect.
The Three Simple DIY Compost Bin Styles I Tested
I tried three different builds in the first six months. Only one stuck as my daily driver. Here’s the honest breakdown.
Test a small bin for a few months to match your waste output before building a large one.
The Plastic Storage Bin Method (My Everyday Winner)
This is the one I still use. Grab a 30-gallon plastic storage tote with a tight lid. Drill a bunch of holes. Done.
What I used:
- One 30-gallon lidded tote (around $12–15 at any big-box store)
- A basic drill and ¼-inch bit
- Ten minutes of my life
I drilled 10–12 holes in the bottom for drainage and another 10–12 around the upper sides for airflow. That was it. No fancy patterns. Just enough so the pile could breathe.
I set it on a couple of bricks so water could drain. Filled the bottom with a thick layer of dry leaves (browns). Added kitchen scraps (greens). Covered with more leaves. Lid on. Done.
This bin is perfect if you have limited space or rent. It hides behind shrubs. It keeps pests out better than open piles. And when it’s full, I just start a second one while the first finishes.
The Pallet Bin (Great If You Have Yard Space)
My second attempt used free pallets. I grabbed four heat-treated ones from a local warehouse (look for the HT stamp). Screwed them into a square. Left the front open so I could turn easily.
It looks rustic. It holds a ton. But it takes more space and attracts more fruit flies if I get lazy with covering scraps. I keep this one for fall leaf piles now. The plastic tote stays my daily kitchen-scrap dump.
The Wire-Mesh Circle (The Lazy Option)
Unroll some hardware cloth or chicken wire into a 3–4 foot diameter circle. Twist the ends together. Drop it on bare dirt. That’s the whole build.
I made one of these in under five minutes. It works. But it looks messy and dries out faster. I abandoned it after one season because raccoons treated it like an all-you-can-eat buffet. Lesson learned: lids matter for beginners.
My takeaway: Start with the plastic tote. Master the process. Upgrade later if you want.
Exactly How I Built My Go-To Compost Bin in 20 Minutes
Here’s the step-by-step I still follow when I gift bins to friends.
- Pick the right container. A 20–40 gallon lidded plastic tote works best. Dark colors heat up nicer in cool weather. Clear ones let me peek without opening (bonus).
- Drill the holes. Bottom: 8–12 holes so excess water escapes. Sides: two rings of holes near the top for air. Lid: a few small ones if you want extra airflow. I used a ¼-inch bit. Bigger holes invite critters.
- Choose the spot. Partial shade. Easy hose access. Not right against the house (smells happen when you screw up). Good drainage underneath. I put mine on a spare paver so it doesn’t sink into mud.
- Build the base layer. Three to four inches of coarse browns: twigs, wood chips, or crumpled cardboard. This creates air pockets at the bottom.
- Start layering. Browns first (dry leaves, shredded paper, cardboard). Then greens (veggie peels, coffee grounds, grass clippings). Aim for roughly two or three parts browns to one part greens by volume. Cover every green addition with browns. Always.
- Moisten and walk away. Sprinkle water until it feels like a wrung-out sponge. Lid on. Forget it for a week.
That’s the entire build. No power tools beyond a drill. No carpentry skills required.
What Actually Goes in the Bin (And What I Learned the Hard Way)
I ruined my first batch by tossing in everything. Here’s the simple list I keep taped inside my kitchen cabinet now.
Greens (nitrogen stuff):
- Fruit and veggie scraps
- Coffee grounds and filters
- Tea bags (no staples)
- Fresh grass clippings
- Crushed eggshells
Browns (carbon stuff):
- Dry leaves (stockpile these in fall)
- Shredded cardboard and newspaper
- Paper towels and napkins (unbleached if possible)
- Twigs and small branches
- Sawdust from untreated wood
Never add these (I tried, I regretted):
- Meat, fish, bones
- Dairy
- Oils and grease
- Pet waste
- Diseased plants
- Glossy magazines or colored paper
Honestly? The ratio trips everyone up at first. Too many greens equals stink. Too many browns equals a pile that just sits there. I keep a big bag of dry leaves next to the bin so I never run short on browns. That one habit fixed 90 percent of my early problems.
If your pile smells like ammonia, increase browns to greens ratio to 4:1 for a week.
How I Keep the Pile Happy Without Becoming a Slave to It
Turning sounds like work. It doesn’t have to be.
I turn my bin every 7–10 days with a sturdy stick or small garden fork. Just flip the outer material into the center. Takes three minutes. If I’m lazy, I skip a week. The pile still finishes. It just takes longer.
Moisture check: Stick your hand in. It should feel damp, not wet. Too dry? Water and turn. Too wet? Add dry leaves and turn. Smell like a swamp? Same fix: more browns and air.
Temperature is fun to track. A healthy pile gets warm in the middle (130–150°F if you’re measuring). I just stick my hand in carefully. Warm means the microbes are working. Cool means I need more greens or a turn.
Pests? Keep food scraps buried under at least four inches of browns. Use a solid lid. Elevate the bin slightly. I had zero rodent issues once I stopped leaving melon rinds on top like an open invitation.
When My Compost Is Actually Ready (And How I Use It)
Most beginner piles finish in 2–6 months if you turn regularly. Mine usually hits ready around the three-month mark.
Signs I look for:
- Dark brown, crumbly texture
- Earthy smell (like a forest floor after rain)
- No recognizable food scraps left
- Cool to the touch
I sift it through a cheap hardware-cloth screen to remove big chunks. Those chunks go back into the active bin. The finished stuff goes straight on my vegetable beds as mulch or mixed into potting soil.
Last summer I mixed a 50/50 blend of my compost and regular potting mix for tomatoes. They grew twice as big as the store-soil ones. Coincidence? Maybe. But I’m not going back.
Common Beginner Mistakes I Made (So You Don’t Have To)
I made every classic error. Here’s the short list that actually matters.
- Starting too big. My first pallet bin held more than I could feed. It sat half-empty and stalled. Start small.
- Ignoring browns. Kitchen scraps alone turn into sludge. Stockpile leaves like your compost depends on it. It does.
- Putting the bin in full sun. It dried out constantly. Partial shade wins.
- Forgetting to chop scraps. Big chunks take forever. I now rough-chop everything with kitchen shears.
- Giving up too soon. The first month looks like nothing is happening. Then suddenly it drops and darkens. Trust the process.
One more: I once added a whole bag of grass clippings without mixing. Instant slime layer. Never again. Always mix or layer.
Insert a perforated PVC pipe vertically into your pile to boost airflow and prevent anaerobic pockets.
Scaling Up Once You’re Hooked
After six months with the plastic tote, I built a simple two-bin pallet system. One bin gets new scraps. The other finishes. I move material between them every few weeks. Production doubled overnight.
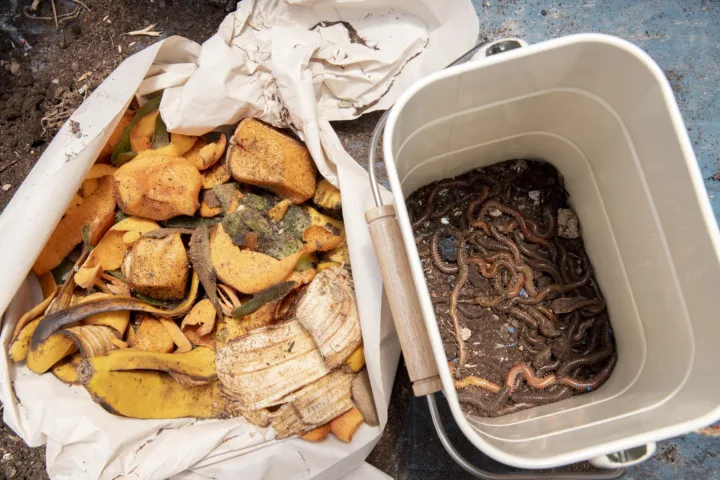
If you live in an apartment, skip the outdoor bin entirely and try a small worm bin under the sink. Same principle, just with red wigglers doing the turning for you. I ran one for a year in a previous place. Zero smell when managed right.
Frequently Asked Questions
How long does a compost bin DIY for beginners actually take to start producing usable compost? Most people see finished compost in 2–4 months if they turn weekly and keep the moisture right. Mine first batch took closer to five because I was still figuring out the ratio.
Do I need worms for a basic DIY compost bin? No. Regular backyard piles work fine without them. Worms speed things up and are great for small indoor setups, but they’re optional for beginners.
Will my DIY compost bin smell bad? Only if you mess up the balance. Too many greens or too much water creates odor. Add dry leaves, turn it, and the smell disappears in a day or two. A well-run bin smells like dirt.
Can I compost in winter? Yes. The process slows way down in cold weather, but it doesn’t stop. I keep adding scraps all winter and let the pile finish when spring warms it up.
What’s the cheapest way to get started with a compost bin DIY for beginners? A free or $10 plastic tote plus a drill. That’s genuinely all you need. Leaves are free. Scraps are already in your kitchen.
Final Thoughts From Someone Who Almost Quit
I almost quit three times in the first month. The pile looked soggy. Fruit flies showed up. I felt like I was failing at something supposed to be simple.
Then I stopped chasing perfection. I added more leaves. I turned when I remembered. And one day I stuck my hand in and pulled out dark, crumbly soil that smelled amazing.
That moment hooked me for life.
You don’t need the perfect setup. You need a bin, some scraps, and leaves, and the willingness to mess up a few times. Build the simple plastic tote version this weekend. Toss in your next coffee grounds. Cover them. Walk away.
In a few months you’ll be spreading free fertilizer on your garden and wondering why you waited so long. I still do.
Now go make some dirt.