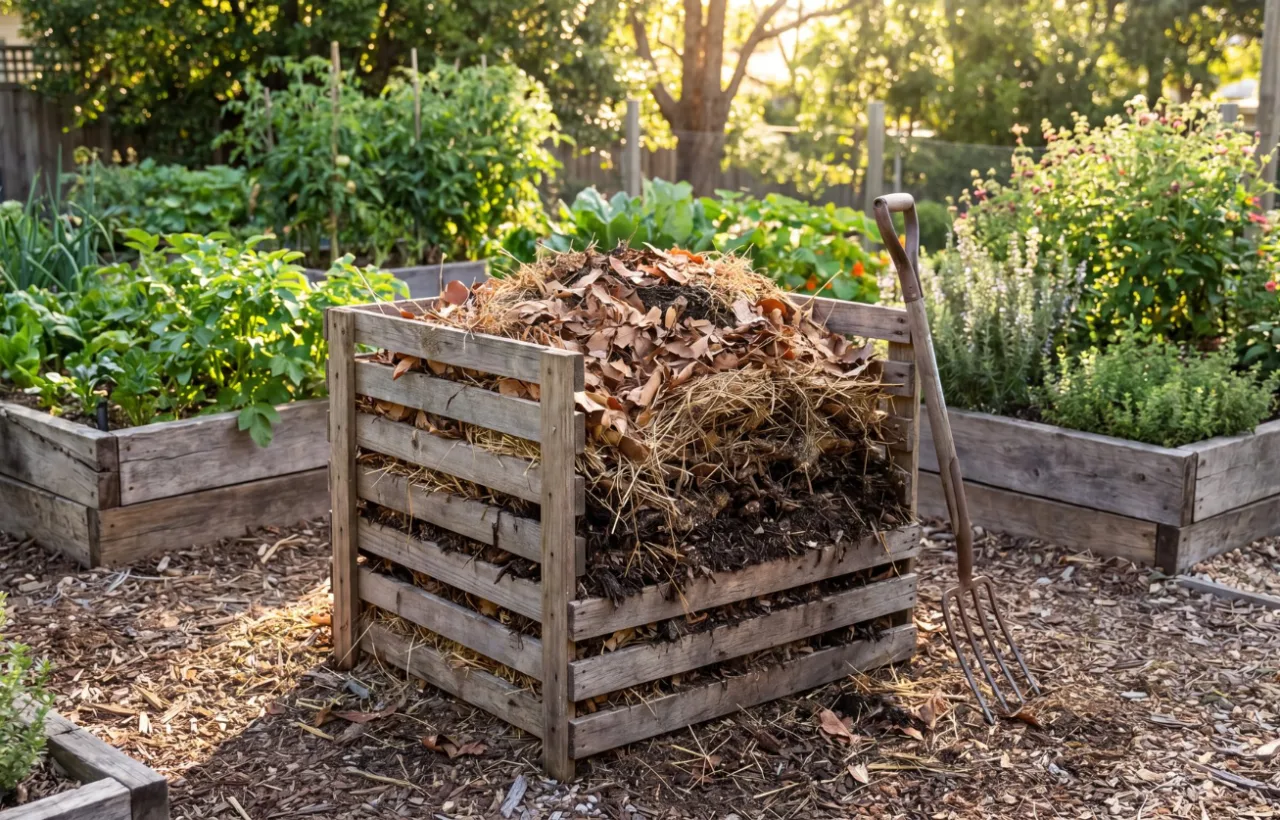

I spent years staring at messy piles of leaves and kitchen scraps in the corner of my yard. They smelled weird. They attracted bugs. And they never turned into the rich black gold I kept reading about. Then I built my first compost bin pallet setup. Everything shifted.
Honestly? I should have done it years earlier.
This compost bin pallet approach costs almost nothing. It handles way more material than those plastic tumblers. And it gives my garden the best compost I’ve ever used. In this guide I walk you through exactly how I did it, the mistakes I made, and the simple tweaks that made mine last.
Why a Compost Bin Pallet Beats Everything Else I Tried
I tried the open heap method first. Total disaster. Wind blew stuff everywhere. Rain turned it into sludge.
Next came a cheap plastic bin. Too small. No airflow. Compost took forever.
Then I spotted free pallets behind the local hardware store. Lightbulb moment.
A compost bin pallet design gives you:
- Massive capacity. Mine holds three times what my old plastic bin did.
- Natural airflow. Those slats let oxygen in so the pile heats up fast.
- Zero cost if you score free pallets.
- Easy expansion. I started with one bay and added two more later.
IMO this is the smartest DIY move any gardener can make.
See, most store-bought bins force you to buy small and upgrade later. A pallet version starts big and stays flexible.
Finding the Right Pallets for Your Compost Bin Pallet
Not every pallet works. I learned that the hard way.
I grabbed three random ones the first time. One had weird chemical stamps. I ditched it.
Here’s what I look for now:
- HT stamp. Heat-treated. Safe.
- No MB stamp. Methyl bromide is toxic. Avoid completely.
- Matching sizes. Roughly 40 by 48 inches works best.
- Solid boards. No major cracks or missing slats.
- Hardwood if possible. Lasts longer than soft pine.
I check the sides and ends for the IPPC or EPAL logo plus HT. Free pallets show up behind grocery stores, garden centers, and warehouses. Ask first. Most places are happy to let you haul them away.
I once scored seven perfect ones in one afternoon. Felt like winning the lottery.
Choosing Your Spot Before You Build
Location matters more than I expected.
I put my first bin in full sun. It dried out constantly. Second try went under a big oak. Tree roots invaded.
Now I pick a spot with:
- Partial sun
- Level ground
- Easy wheelbarrow access
- At least ten feet from the house
I clear the area and level it with a shovel. Takes ten minutes. Worth every second.
How I Built My Basic Three-Sided Compost Bin Pallet
I started simple. Three pallets formed a U shape.
Tools I used:
- Work gloves
- Zip ties or baling wire
- A few stakes
- Optional screws and drill
Steps I followed:
- Stand two pallets on end for the sides.
- Place the third across the back.
- Bind the corners tightly with zip ties or wire at top and bottom.
- Drive stakes through the bottom gaps into the ground for stability.
Done. Ten minutes if the ground is flat.
I left the front open at first. Easy loading. Once the pile hit halfway I wired a fourth pallet across as a gate.
Upgrading to a Four-Sided Compost Bin Pallet With a Door
The open front worked until the pile got tall. Then stuff spilled.
So I added a door.
I cut a fourth pallet in half with a saw. Attached the bottom half with hinges so it swung open like a stable door. Hook-and-eye latches kept it shut.
This version stays neat. I can still reach everything easily.
For extra strength I screwed corner brackets on the inside. Optional but I like the solid feel.
Going Big: My Three-Bay Compost Bin Pallet System
One bay filled up fast. I needed more.
I added two more bays side by side. Total of seven pallets.
Here’s the layout I use:
- Bay 1: Fresh scraps go here.
- Bay 2: Middle stage. I turn material from Bay 1 into this one.
- Bay 3: Finished compost waiting to be used.
Turning becomes easy. I just fork everything one bay over. No heavy lifting out of a single deep pile.
This setup changed my composting game completely. I always have ready compost and space for new material.
Materials That Make the Build Stronger
Basic wire works. Better hardware lasts longer.
What I recommend:
- 3-inch deck screws instead of just wire
- Corner brackets for rigidity
- Hinges and latches for the door
- Chicken wire stapled inside to stop small bits escaping
- Stakes or rebar driven into the ground
I spent under $20 total on hardware. Everything else was free.
Filling and Managing Your Compost Bin Pallet
Building is the easy part. Managing keeps it working.
I layer like this:
- Browns first: dry leaves, cardboard, twigs
- Greens next: grass clippings, kitchen scraps, coffee grounds
- Repeat
I aim for roughly two parts brown to one part green.
Moisture should feel like a wrung-out sponge. Too dry? I water it. Too wet? I add more browns and turn.
I turn the pile every two to four weeks. The open sides make this simple.
Cover the top with old carpet, cardboard, or a tarp. Keeps rain from flooding it and heat from escaping.
Common Problems I Hit and How I Fixed Them
My first pile stayed cold. Not enough greens. I added more grass and kitchen scraps. Heat kicked in within days.
Smells showed up once. Too many wet greens. I mixed in dry leaves and turned it. Smell vanished.
Pests tried to move in. I stopped adding meat and dairy. Wired the bottom with hardware cloth. Problem solved.
I painted the outside with leftover outdoor stain. Looks better and the wood lasts longer.
Pros and Cons From My Real Experience
Pros
- Free or nearly free
- Huge capacity
- Excellent airflow
- Easy to expand
- Looks rustic and natural
Cons
- Can look rough if you don’t paint or stain
- Wood eventually breaks down (mine lasted four years)
- Takes space
- Needs two people to haul pallets sometimes
The pros win for me every time.
Tips That Made My Compost Bin Pallet Last Longer
I learned these the hard way.
- Paint or stain the outside before filling.
- Keep the bottom off bare soil if possible. A fifth pallet as a base helps.
- Line the inside with cardboard or weed fabric to reduce fall-through.
- Cover the top religiously in winter.
- Don’t overload one side. Balance the weight.
These small habits added years to the life of my bins.
Frequently Asked Questions
Is a compost bin pallet safe for vegetable gardens? Yes if you use only heat-treated HT pallets. I never use anything with an MB stamp and my veggie beds love the compost.
How long does a pallet compost bin last? Mine held up four solid years. Better wood and paint can push that further.
Do I need a lid on my compost bin pallet? Not required but highly recommended. A tarp or old carpet keeps moisture steady and heat in.
Can I build a compost bin pallet alone? Absolutely. I did the first one by myself. Zip ties make it easy. A helper just speeds things up.
What size should my compost bin pallet be? Aim for at least 3 by 3 by 3 feet. That size holds heat properly. Bigger is fine if you have the space.
Final Thoughts From Someone Who Almost Gave Up
I almost quit composting after that first soggy pile. Honestly? I felt defeated.
Building the compost bin pallet setup flipped the script. Suddenly I had structure. Airflow. Capacity. And real results.
My garden beds thank me every season. The soil is darker. Plants are stronger. And I send almost nothing to the landfill.
Grab some free pallets this weekend. Level a spot. Wire them together. Start layering.
You’ll wonder why you waited so long. I know I did.


