
I spent two full summers staring at a bare concrete slab and feeling like a failure at growing anything. My first attempt at a mini balcony garden ended with three dead basil plants and a soggy bag of potting soil that never left the corner. Honestly? I almost gave up for good.
Then I stopped trying to copy the giant backyard plots I saw online and started treating my four-by-eight-foot balcony like the small, sunny puzzle it actually was. That shift changed everything. Now I harvest herbs for dinner, cut flowers for the table, and sit outside with a coffee while actual green things grow around me. This is the full story of how I did it, the mistakes I made, and the exact steps that finally worked.
Why a Mini Balcony Garden Actually Makes Sense
I live in a second-floor apartment with no yard and strict rules about weight and drainage. Most people tell me a real garden needs more space. I think that’s the wrong way to go about it. Space isn’t the limiting factor. Light, containers, and consistency are.
A mini balcony garden gives you fresh food without a car trip. It softens the hard edges of city living. It also forces you to pay attention to weather and seasons in a way that makes daily life feel less flat. FYI, the first time I snipped my own chives for scrambled eggs, I felt weirdly proud of myself for something so small.
You don’t need a big budget or fancy tools. You need a clear plan and the willingness to kill a few plants while you learn.
Assessing Your Balcony Before You Buy a Single Pot
I measured my space with a cheap tape measure and noted three things: how many hours of direct sun it gets, which direction it faces, and where water drains.
My balcony faces southeast. It gets solid morning light and some afternoon shade. That ruled out full-sun tomatoes in the back corner. I also checked the weight limit with my landlord. Lightweight plastic and fabric grow bags became my default.
Write down the answers for your own space. Sun hours decide almost every plant choice. Drainage decides whether you wake up to a flooded neighbor complaint. Those two details save you more money than any “best pots” list ever will.
A southeast balcony’s usable light changes as the sun’s seasonal angle shifts, so recheck shadows before committing to sun-hungry plants.
Checking Light and Wind
Stand outside at different times of day for a week. Note when the sun hits and when it disappears. Wind matters too. Strong gusts dry out soil fast and knock over tall pots. I added a simple trellis against the railing that doubles as a wind break for the more delicate plants.
Choosing Containers That Don’t Wreck Your Floor or Your Back
Heavy ceramic looks pretty in photos. On a real balcony it becomes a liability. I switched to a mix of fabric grow bags, lightweight resin pots, and hanging planters that clip to the railing.
Here’s what I use now:
- Fabric grow bags in 5- and 10-gallon sizes for herbs and leafy greens. They stay cool, drain well, and weigh almost nothing when empty.
- Resin pots with drainage holes for longer-term plants like dwarf peppers.
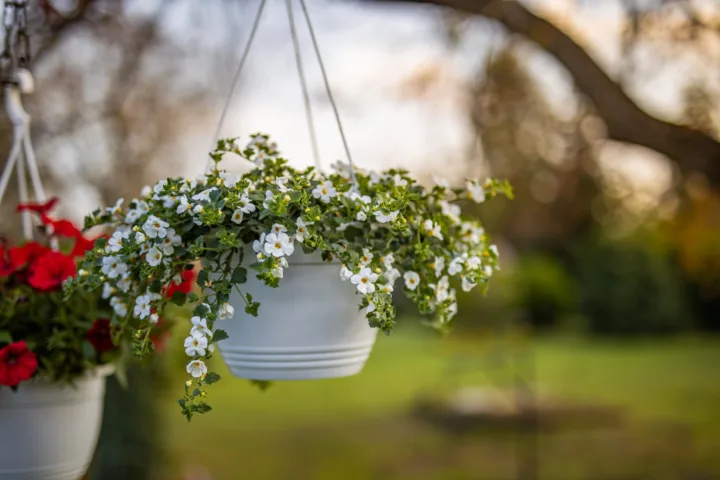
- Railing planters for trailing plants and quick-access herbs.
- Vertical wall pockets for strawberries and small greens.
I avoid anything that holds water at the bottom. Standing water kills roots and invites mosquitoes. Every pot gets a saucer or sits on feet so air can move underneath.
A fabric grow bag becomes far heavier after watering; position larger bags before filling, especially near railing edges.
Soil and Drainage: The Part Most Beginners Skip
I used to buy the cheapest bag of soil at the hardware store. Plants struggled. Then I mixed my own blend: one part potting soil, one part compost, and a handful of perlite for drainage. That mix holds moisture without turning into mud.
For a mini balcony garden you need soil that stays light. Heavy garden dirt from the ground compresses and turns into concrete in containers. Stick to mixes labeled for pots. Add a slow-release organic fertilizer at planting time and top-dress with compost every few weeks. Plants in small spaces run out of nutrients faster than you expect.
Plants That Actually Thrive in a Mini Balcony Garden
I tried too many things at once the first year. Half of them failed. Now I stick to reliable producers and a few pretty fillers.
Herbs That Pull Their Weight
Basil, mint, chives, parsley, and thyme grow fast and get used constantly. Mint goes in its own pot because it takes over everything. I keep a small pot of oregano near the kitchen door so I can grab it while cooking.
Easy Vegetables for Containers
Cherry tomatoes in a 10-gallon bag, dwarf peppers, salad greens, radishes, and bush beans all work. I grow two or three tomato plants and rotate the rest by season. Leafy greens love the cooler shoulder months. In summer I switch those pots to heat-tolerant herbs.
Flowers That Don’t Demand Constant Attention
Marigolds keep pests away and look cheerful. Nasturtiums trail over the edge of pots and the leaves are edible. A couple of trailing petunias add color without needing daily care. I skip anything that needs deadheading every other day. Life is too short.
Vertical Options
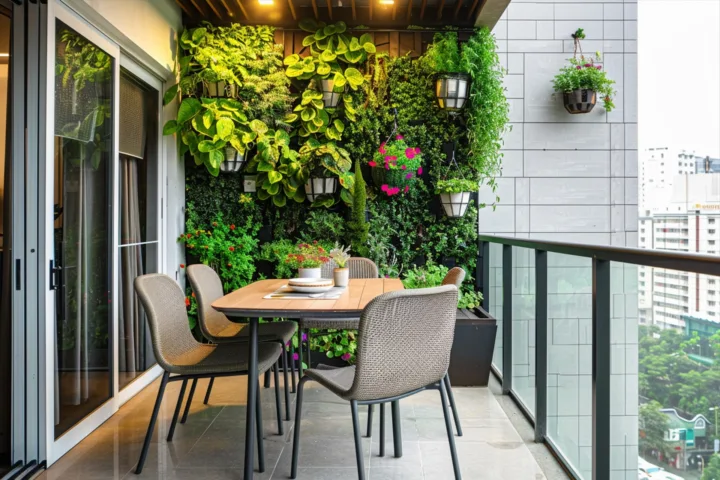
Climbing beans and cucumbers on a simple trellis turn the railing into extra growing space. Strawberries in wall pockets give me small handfuls of fruit without taking floor room. Vertical growing is the single biggest reason my mini balcony garden produces more than it should.
Layout Strategies That Keep the Space Usable
I made the classic beginner mistake of filling every square inch with pots. Walking became a obstacle course. Now I leave a clear path to the door and a small chair for sitting.
Tall plants go against the wall or railing so they don’t block light for shorter ones. I group pots by water needs so I can water the thirsty ones without drowning the rest. A narrow shelf unit holds smaller herbs at eye level. The floor stays open enough for a folding stool.
One simple rule I follow: if I can’t reach a plant easily to water or harvest it, it doesn’t belong there.
Watering and Daily Care Without Turning It Into a Chore
Containers dry out faster than garden beds. In summer I water most pots every morning. On hotter days some need a second light watering in the evening. I stick my finger two inches into the soil. If it feels dry, I water. If it’s still moist, I wait.
A cheap watering can with a long spout reaches the back pots without me climbing over everything. Once a week I check for yellow leaves or pests. Aphids show up sometimes on the basil. A quick spray of soapy water usually handles them. I never let problems build up for more than a day or two.
Feeding is simple. I use a diluted liquid organic fertilizer every two weeks during active growth. Overfeeding burns roots in small pots, so I stay conservative.
Group pots by thirst: keep basil and leafy greens together, while placing dwarf peppers separately to avoid applying one watering schedule to everything.
Common Mistakes I Made (So You Can Skip Them)
I planted too many tomatoes in pots that were too small. The plants stayed stunted and produced almost nothing. Size matters. A tomato needs at least a 5-gallon container, preferably 10.
I ignored the weight of wet soil. After a heavy rain one pot cracked the cheap plastic tray underneath and leaked onto the neighbor’s table. Now everything sits on proper saucers or stands.
I chased trends instead of what grows well in my conditions. Fancy microgreens looked great online. In practice they needed more attention than I wanted to give. Stick to plants that match your light and your schedule.
Seasonal Adjustments for Year-Round Interest
Spring is for salad greens and early herbs. Summer brings tomatoes, peppers, and basil. Fall is radishes, more greens, and kale if the weather cooperates. Winter is quiet. I move the hardiest pots closer to the wall for protection and start a few indoor herbs on the windowsill.
I keep a simple notebook with planting dates and what worked. Looking back at last year’s notes saves me from repeating the same failures.
Budget Breakdown of My Current Setup
I spent about $180 total over two seasons. That includes:
- Six fabric grow bags and four resin pots
- A basic trellis and two railing planters
- Soil, compost, and fertilizer
- Seeds and a few starter plants
- A watering can and small hand tools
You can start smaller. Three pots, good soil, and a handful of herb plants will teach you more than a full setup you never maintain.
Frequently Asked Questions
How much sun does a mini balcony garden really need? Most edible plants want at least four to six hours of direct light. Herbs and leafy greens tolerate a bit less. If your balcony is mostly shade, stick to ferns, hostas, or shade-tolerant herbs and accept that fruiting plants won’t perform well.
Can I grow real food in such a small space? Yes. I harvest enough herbs for daily cooking and get regular bowls of salad greens and cherry tomatoes through summer. It won’t feed a family of four, but it adds real flavor and reduces grocery trips.
What if my landlord has strict rules? Focus on lightweight containers, proper drainage saucers, and plants that stay contained. Keep everything neat and avoid anything that could drip onto lower floors. Clear communication helps more than people expect.
How often should I replace the soil? I refresh the top few inches each spring and fully replace the mix in smaller pots every two years. Larger bags can go longer if I keep adding compost.
Is a mini balcony garden worth the effort if I’m busy? IMO it is, as long as you keep the plant list short and the routine simple. Ten minutes of watering and a weekly check is enough once the system is set up. The payoff in fresh flavor and a greener view is bigger than the time cost.
Final Thoughts From Someone Who Almost Quit
A mini balcony garden will not look like the magazine photos at first. Plants will die. Pots will tip over in the wind. You will forget to water something important. That is normal.
What matters is starting small, paying attention to what your specific space can support, and adjusting without drama. My balcony still has bare spots and the occasional yellow leaf. It also has fresh basil whenever I want it and a place that feels like mine.
Grab one pot this weekend. Fill it with decent soil and a plant that matches your light. Water it. Watch what happens. That single step is how every working mini balcony garden begins.