
I built my first balcony rock garden after three failed attempts at keeping regular pots alive. Honestly? Those early tries left me frustrated and ready to give up on outdoor plants altogether. The constant watering, the soggy soil after rain, the plants that stretched and yellowed in my limited light. Nothing worked until I switched to rocks, gravel, and tough little plants that actually prefer neglect.
That change fixed everything for me. A balcony rock garden needs almost no soil depth, drains fast, and looks intentional even when you forget about it for a week. I share the exact steps I used so you can skip the trial and error that cost me time and money.
Why a Balcony Rock Garden Makes Sense for Small Spaces
Apartment living taught me that traditional gardening rarely fits. My balcony measures about six by eight feet. Full sun hits it for five hours on good days. Wind funnels through the railings. Water has nowhere to go except straight down to the neighbors below if I overdo it.
A rock garden solves those problems. Rocks hold heat and release it slowly. Gravel stops water from pooling. Succulents and alpine plants thrive in thin soil layers. I no longer drag heavy bags of potting mix up three flights of stairs. The whole setup stays light enough that the building manager never complained about weight.
See, most people assume rock gardens only work in big yards with slopes. I think that’s the wrong way to go about it. Scale is the real question, not size of the property. My version sits inside a few large shallow containers and one long trough along the railing. It still delivers that mountain-side feel.
Test each container with measured water before planting, confirming drainage stays within your balcony footprint rather than reaching neighbors below.
Gathering the Materials I Actually Used
I started simple. No fancy stone supplier. No truck delivery. Just what I could carry home on the bus or order online in manageable boxes.
Here is the list that worked for me:
- Shallow containers or troughs with drainage holes. I used two plastic ones that look like stone and one wooden crate lined with landscape fabric.
- Coarse gravel or clay pebbles for the bottom layer. About two inches deep.
- Gritty soil mix. Half potting soil, half perlite or coarse sand. I mixed my own.
- Rocks of mixed sizes. Large ones for anchors, medium for structure, small pebbles for fill.
- Plants that stay compact. Mostly succulents and a few herbs.
I spent under $80 the first time. The rocks came from a local garden center clearance bin. The plants were three-inch pots from a big-box store. FYI, you can start even smaller with one tray if your space feels tight.
Weight mattered. I checked my balcony load rating first. Shallow layers keep the total under control. Never stack heavy stones higher than six inches without a solid base.
Choose pale plastic containers for the sunniest locations, since dark ones can heat shallow root zones more quickly than stone-look materials suggest.
Building My Balcony Rock Garden Step by Step
I cleared the floor one Saturday morning. Swept away old leaves and spider webs. Then I placed the containers where they would get the most light without blocking the door.
Layering for Perfect Drainage
Drainage is non-negotiable. I filled each container with two inches of clay pebbles. On top of that went a thin piece of landscape fabric so the soil would not sift down. Next came three to four inches of the gritty mix. I pressed it lightly but left it loose enough for roots to move.
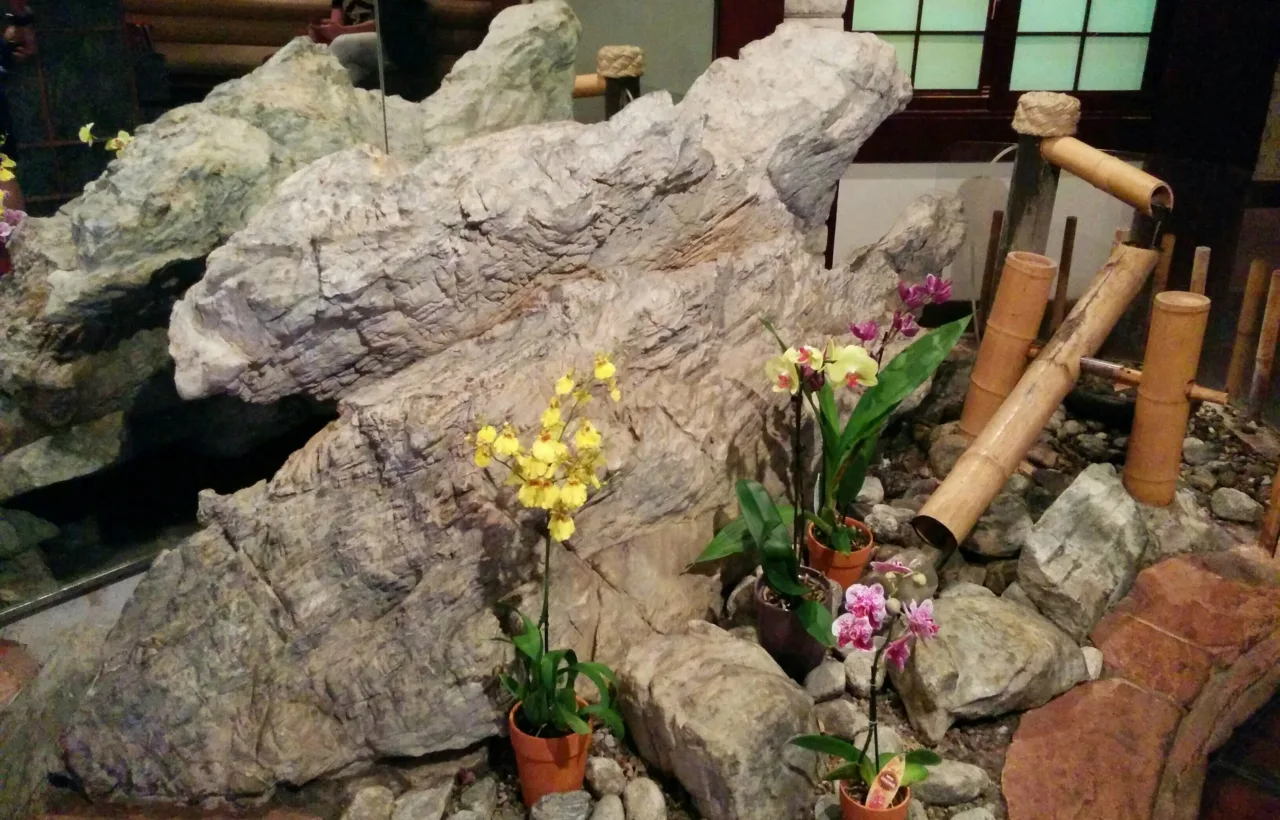
The large rocks went in next. I set three bigger stones at different heights to create small hills. Medium rocks filled gaps. I tucked the plants into pockets of soil between the stones. Small pebbles covered the remaining soil surface. That top layer keeps moisture even and stops weeds.
Watering the first time felt strange. The water disappeared almost immediately. No standing puddles. Exactly what the plants needed.
Choosing Plants That Survive My Neglect
I picked plants that store water in their leaves or roots. My current mix includes:
- Sempervivum (hens and chicks). They multiply on their own and handle cold nights.
- Sedum varieties that stay low and spill over edges.
- Echeveria for the soft rosette shapes.
- Thyme and oregano. They smell good when I brush past them and need almost no care.
- One small aloe that sits in a sunny corner.
I avoided anything that grows tall or needs rich soil. Those plants fail fast on a balcony. My rule is simple: if it needs weekly water or deep roots, it stays off the list.
After six months the hens and chicks had babies. I moved a few to empty spots. The garden filled itself without extra purchases.
Design Tricks That Made Mine Look Bigger
Space is limited, so I used height and contrast. One container sits on a low plant stand. That lifts it six inches and creates a second level. A second trough hangs from the railing with sturdy brackets. Vertical interest fools the eye into seeing more depth.
Color contrast helps too. Dark gray rocks sit next to pale gravel. Green succulents pop against both. I added one piece of driftwood I found on a walk. It anchors the whole scene without looking busy.
Lighting changed the evening view. Two small solar lights tucked behind the largest rocks cast soft shadows after dark. I sit out there with coffee some mornings and just stare at the shapes. The garden feels finished even when nothing blooms.
IMO the biggest mistake people make is overcrowding. Leave breathing room between plants. They grow into the spaces. Crowding turns the display messy within a season.
Secure the railing trough and solar lights against wind movement, especially where funneling could turn loose pieces into falling hazards.
Maintenance That Fits a Busy Schedule
I water once every ten to fourteen days in summer. Less in cooler months. I stick my finger into the soil. If it feels dry two inches down, I water. If not, I walk away.
Weeds almost never appear because the pebble layer blocks light. Dead leaves get plucked when I notice them. That takes maybe five minutes a month. No fertilizing. The plants stay compact without extra food.
Winter was the real test. I live in a zone that freezes. Most of the hardier plants stayed outside under a light cover of dry leaves. The more tender ones came inside for three months. They sat on a sunny windowsill and survived just fine. Come spring I moved them back out and the garden looked better than before.
After returning tender plants outdoors, place them in bright shade for several days before exposing them to the balcony’s full five-hour sun.
Common Problems I Hit and How I Fixed Them
Overwatering nearly killed my first echeveria. The leaves turned mushy. I pulled it, let the roots dry for a day, and replanted in fresher grit. It recovered. Lesson learned: when in doubt, underwater.
Wind blew a few small pots over once. I solved that by nesting the lighter containers inside heavier outer ones. The extra weight holds everything steady.
Neighbors below complained about drips after a heavy rain. I added drip trays under the containers and emptied them the next morning. Problem gone.
Pests stayed minimal. Aphids showed up on the thyme one summer. A quick spray of soapy water cleared them. Rocks and dry conditions discourage most bugs.
Expanding the Idea Without Losing the Look
After a year I added a second small trough. Same style, same plants. The two pieces now sit side by side and feel like one continuous garden. I could keep going, but the current size feels right for the space I have.
Some people mix in a tiny water feature. I tried a small ceramic bowl with a solar pump. The sound was nice for a week. Then leaves clogged the pump and I removed it. Rocks alone keep the calm without the extra work.
You can go full zen with only rocks and raked gravel if plants feel like too much. I prefer the living version. The slow growth of the succulents rewards patience.
Frequently Asked Questions
Can I create a balcony rock garden if my space gets only partial sun? Yes. Choose plants that tolerate less light, such as certain sedums and sempervivums. Place the containers in the brightest available corner and rotate them every few weeks so growth stays even.
What is the best soil mix for a balcony rock garden? Use a gritty blend of half regular potting soil and half perlite or coarse sand. This mix drains fast and prevents root rot, which is the main killer of rock garden plants on balconies.
How much weight can a typical balcony handle for a rock garden? Most residential balconies support far more than a few shallow containers filled with rocks and gravel. Keep layers thin and avoid stacking heavy boulders. Check your building rules if you feel unsure.
Do I need special containers for a balcony rock garden? Any shallow pot or trough with drainage holes works. I prefer ones that look like natural stone so the plastic disappears into the design. Line wooden boxes with fabric to protect the wood.
How often should I water plants in a balcony rock garden? Water only when the soil feels dry a couple of inches down. In my experience that means every ten to fourteen days in warm weather and far less in cooler months. Overwatering causes more problems than underwatering.
I still walk out to that balcony most mornings. The rocks catch the early light. The plants stay tidy without demanding attention. Building it taught me that small outdoor spaces can hold real gardens if you match the method to the conditions. Start with one container this weekend. Place a few rocks. Tuck in a couple of tough plants. You will see the difference right away. And once it settles in, you might find yourself looking for more spots to expand.